This article provides you with a step-by-step guide on how to get started with Bobsled Sledhouse to create Data Products.
SCHEDULING DATA PRODUCTS KNOWN LIMITATIONS:
• Scheduled Data Products are currently supported for File Storage and Snowflake destinations.• Support for additional Data Warehouse destinations (such as Databricks and BigQuery) is planned for future releases.
• Make sure scheduling is enabled in your environment. If it isn’t, please contact your account representative.
Prerequisites
Bobsled Account: You must have access to Bobsled’s main application and the Sledhouse tab/feature enabled in your environment.
To successfully create a Data Product, you must have at least one Sledhouse Table—which requires at least one Data source—preconfigured in Bobsled.
To successfully schedule a Data Product ↓ for Cloud Data Warehouse destinations, a local copy must be available in the target destination.
NOTE:
What you can see and do will differ based on your role and permissions.
Setup instructions
Step 1: Define your Data Product
.png)
In the Bobsled Application, locate and select the Data Products Tab, then select the “Define Data Product” button
In the wizard, choose how you’d like to define a Data Product.
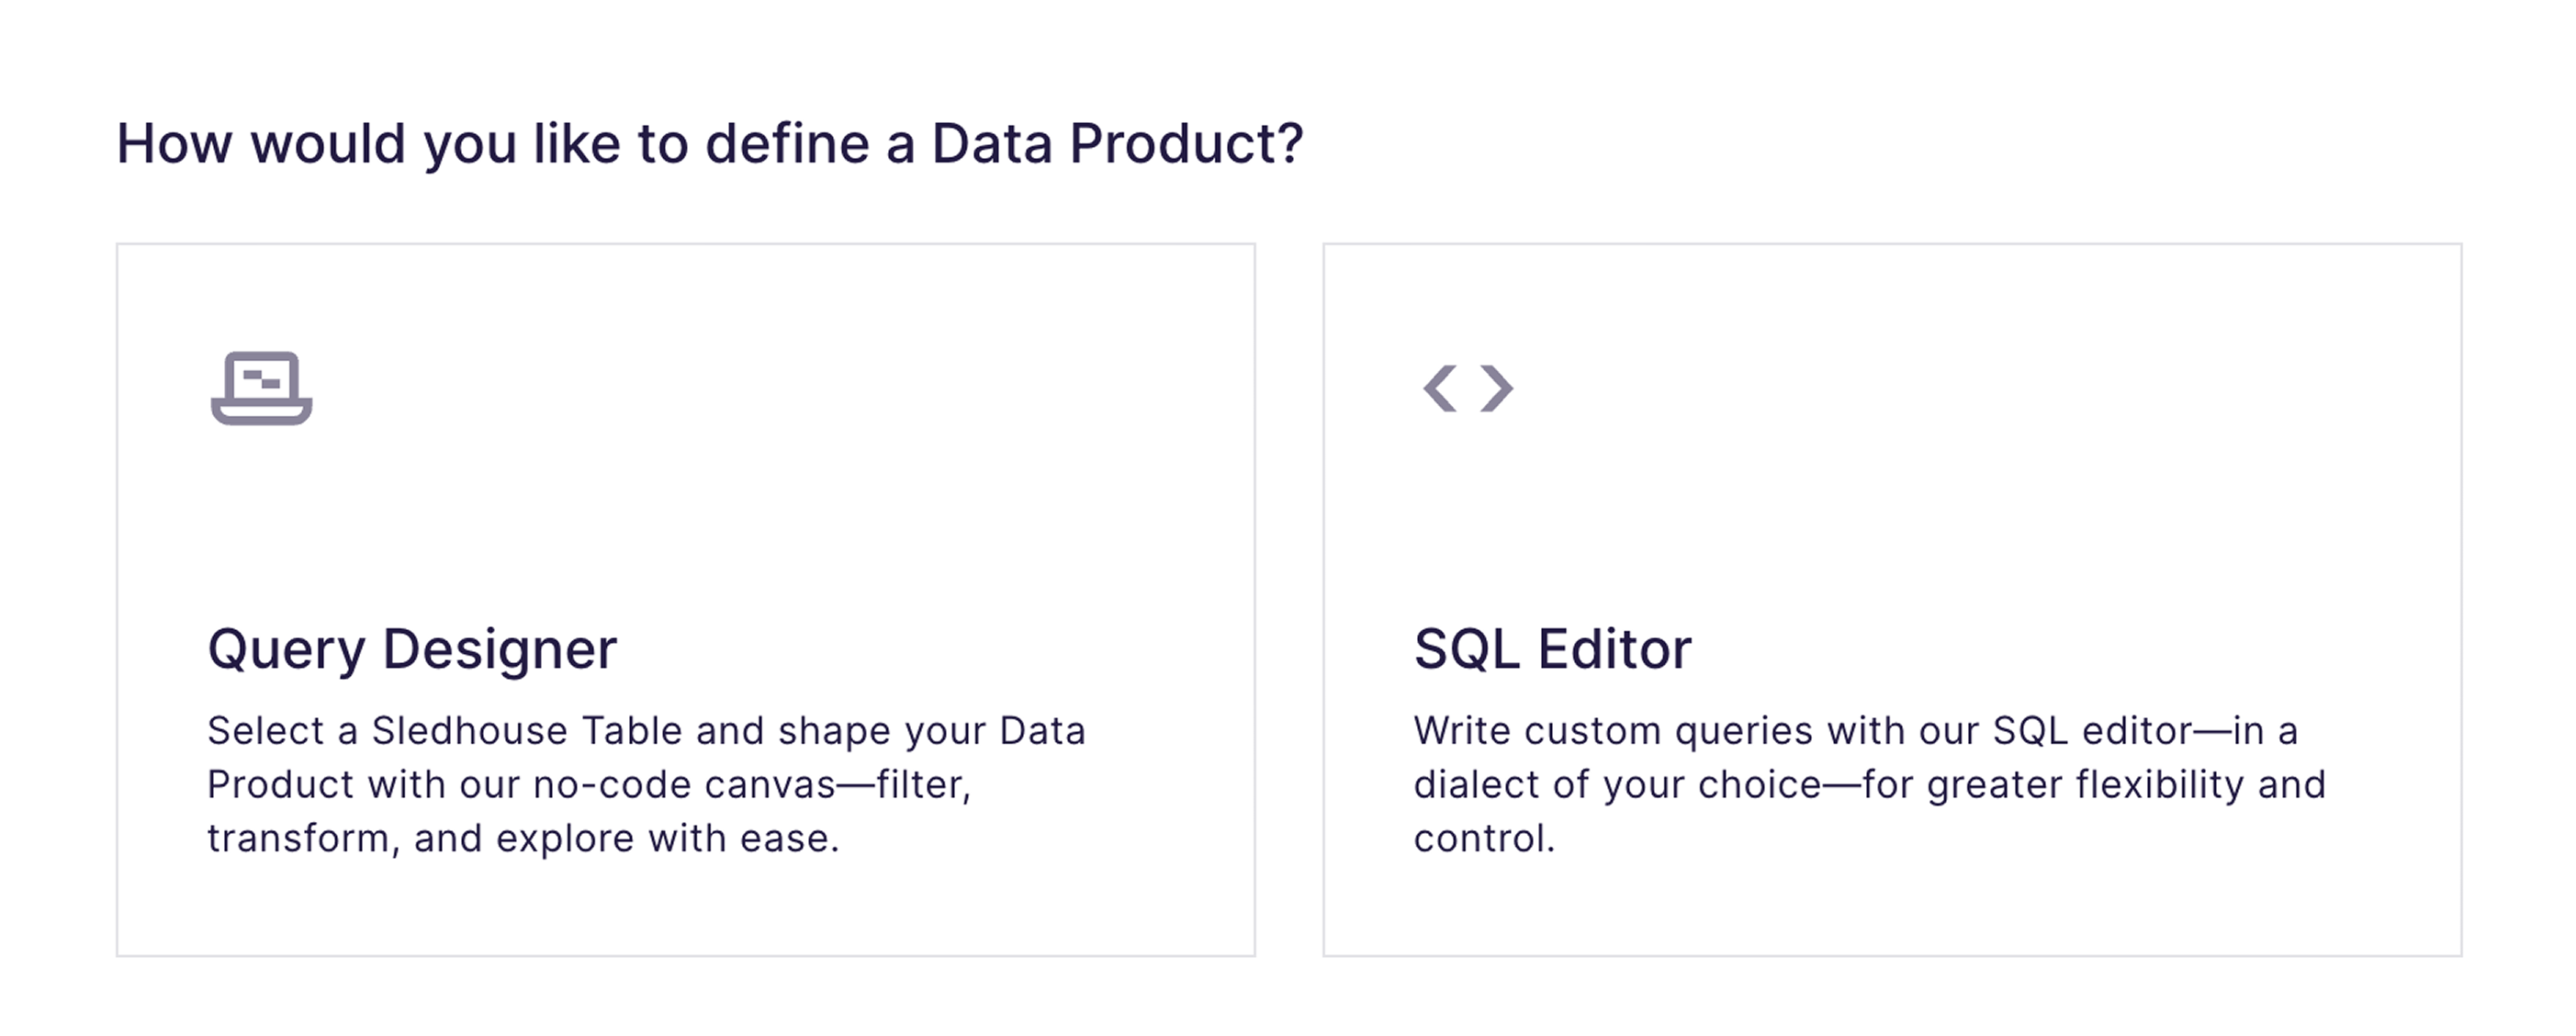
TIP:
• The Query Designer is built with non-technical users in mind. Currently, it supports referencing only one Sledhouse Table.
• The SQL Editor is for power users, offering full flexibility and control. SQL-based Data Products can reference multiple Sledhouse Tables and even other Data Products.
Option 1: Via Query Designer (no code)
In this mode, Bobsled empowers users to choose to include or exclude certain columns from a sledhouse Table in a data product and use a no-code query build to control the rows returned in the data product. This enables fulfillment teams to control data entitlements without writing any code.
.png)
Choose a source Sledhouse Table to define a Data Product from and select continue.
In the query canvas, optionally select which columns you want to be included or excluded from the Data Product. By default, all columns are included, and you must choose which columns to exclude.
TIP:
• Use the arrow buttons in the middle to quickly move columns between sections. You can also drag and drop columns between the two squares.
• Hovering on object on the left-side panel will display additional metadata.
• To reference a different Sledhouse Table, select the pencil icon (edit) in the Selected Sledhouse Table section. Changing the table will remove any existing customizations.
NOTE:
• In this mode, at least one column must be included for the Data Product to be valid and saved.
• Columns used for partioning display a key icon. Bobsled recommends keeping partioning key columns, and will alert you if you exclude them.
Set your Data Product’s schema evolution preferences.
NOTE:
• By default, new columns added to your Sledhouse Table will are placed in the exclude list. To automatically include new columns, enable the toggle.
• Currently, Bobsled only supports additive schema changes. For more information, please contact your account representative.
.png)
Optionally apply row filtering, using an easy-to-use query builder that allows for defining filters (predicates in an SQL statement) that control what data is returned.
This feature will let you quickly define filters like “
event_dateis in the past 30 days”.Multiple filters can be combined using
ANDorORsemantics to create almost any data product definition required. For more complex data products, the SQL builder and co-pilot option can be used.
Click the Run button to get a 100-row sample of your Data Product and a row count. Once happy with the shape of your Data Product, click save.
NOTE:
• You can define a Data Product while a Sledhouse Table is performing its initial sync.
• However, you won’t be able to preview the query until the sync finishes—the system will let you know when it’s still in progress.
Option 2: Via SQL Editor
.png)
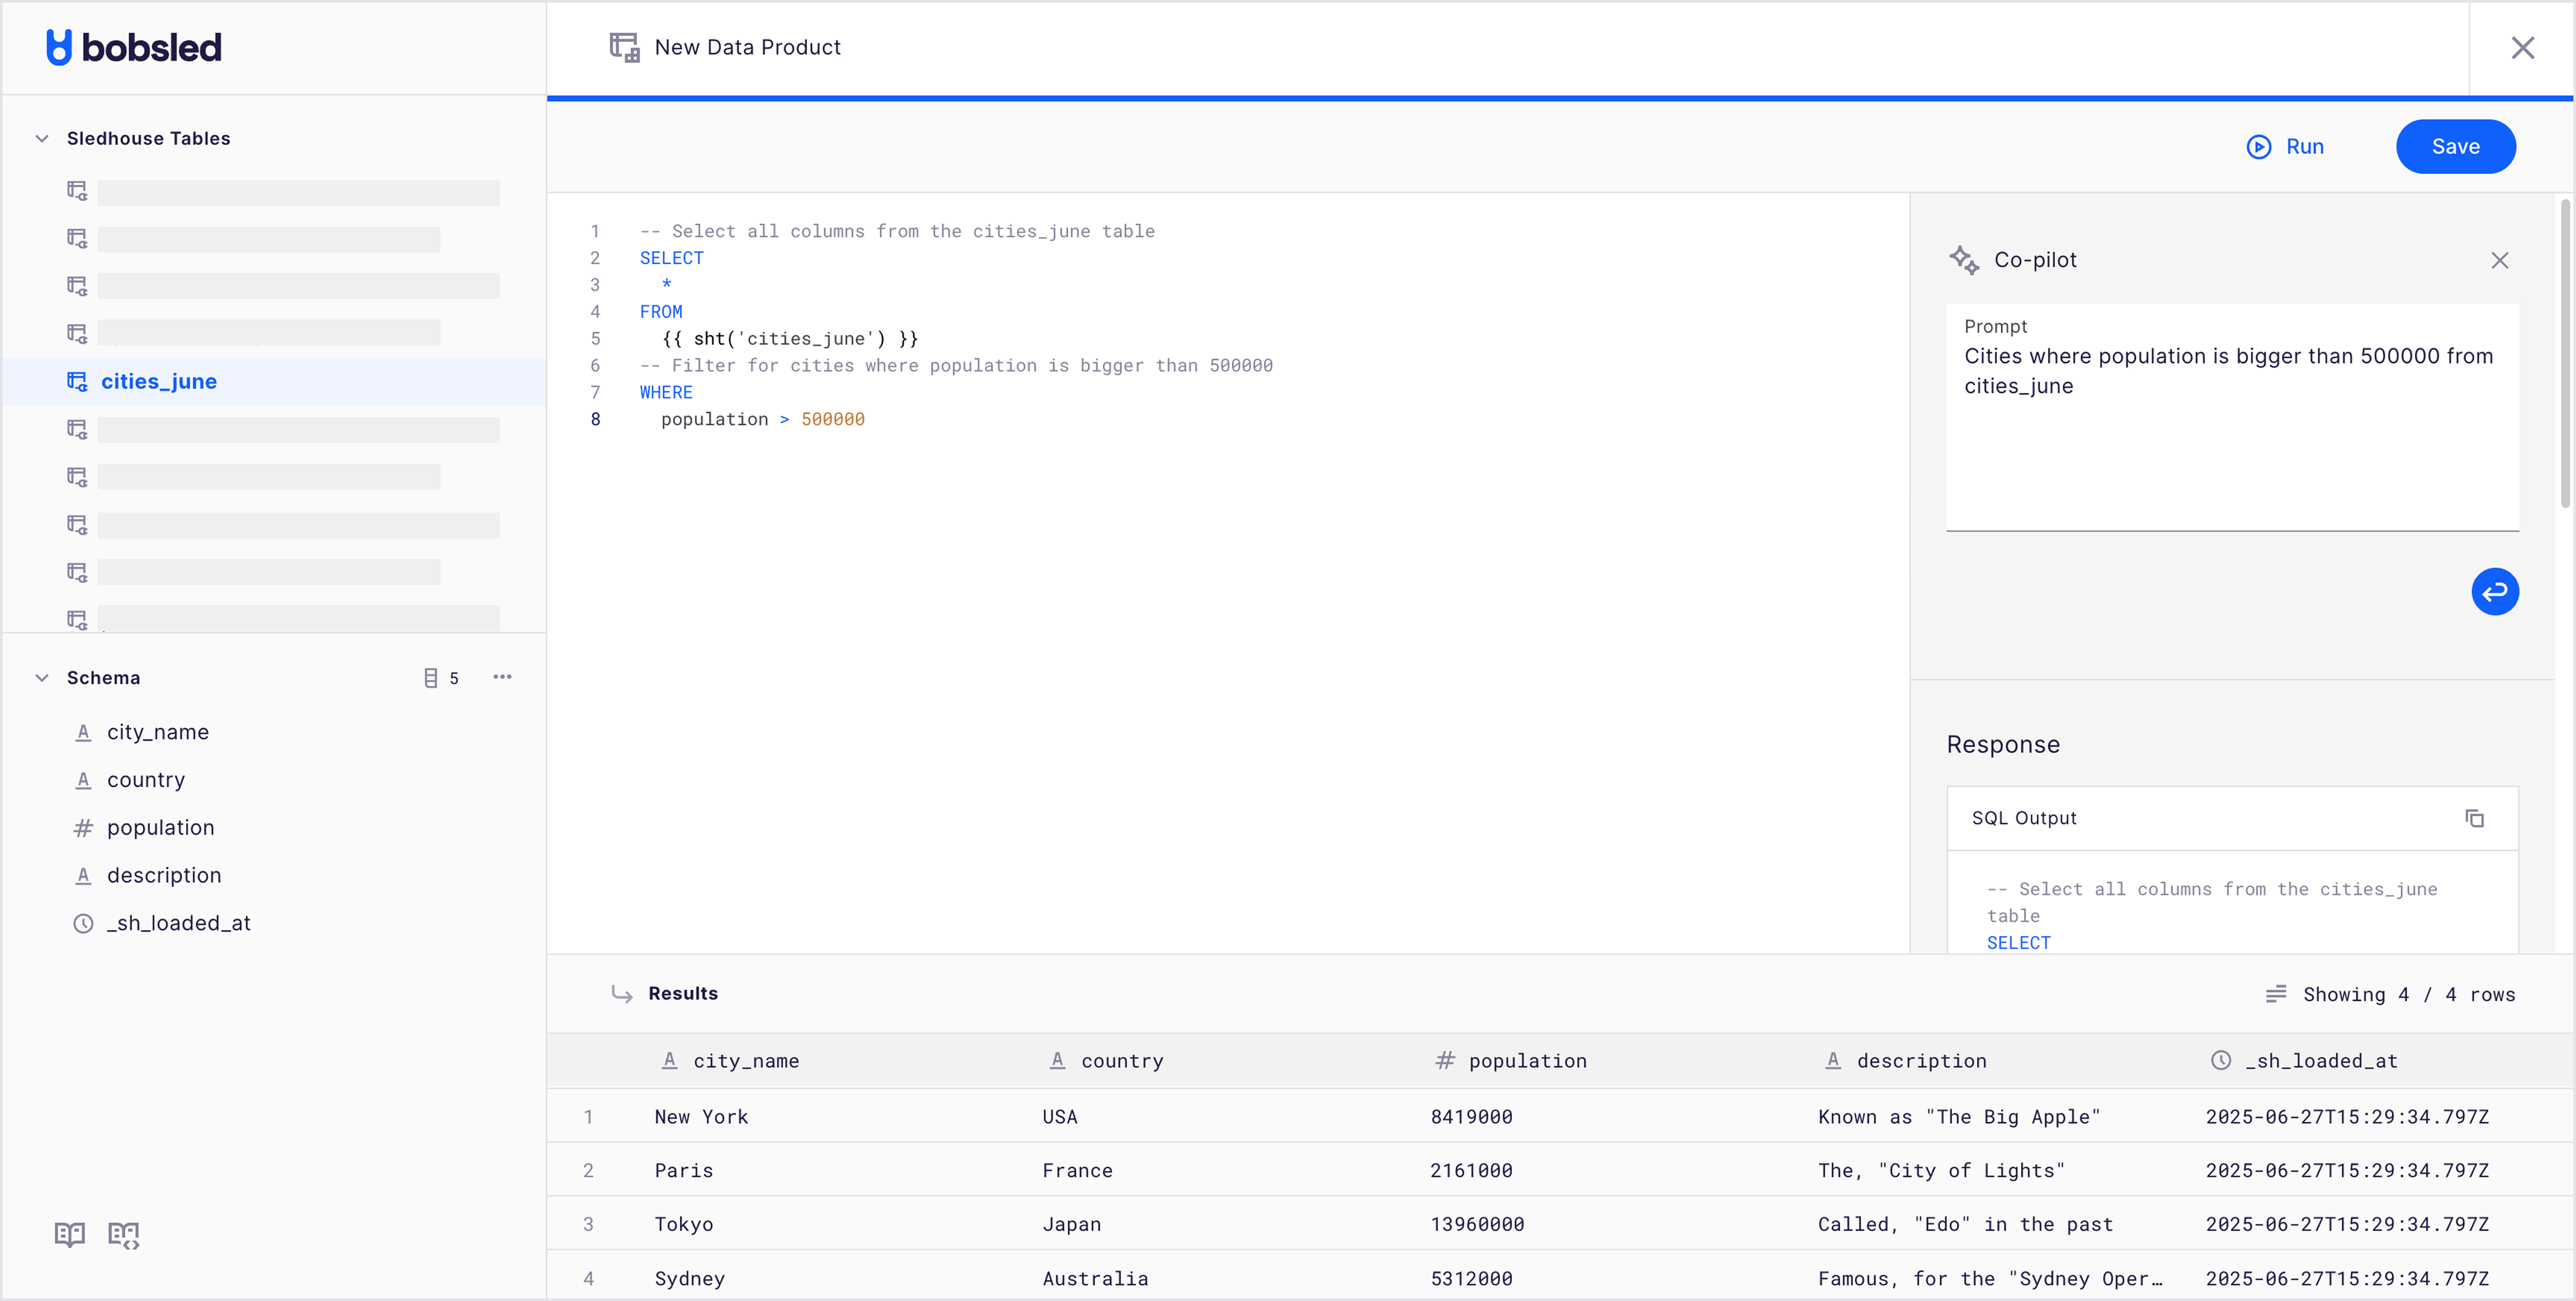
In the SQL editor canvas, a built-in SQL editor lets you write transformations using Snowflake-compatible syntax.
Optionally select a Sledhouse Table to see metadata about it or its schema.
Reference objects by their name using
{{ sht('sledhouse_table_name') }}syntax, or{{ dp('data_product_name') }}Example:
SELECT
  *
FROM
  {{ sht('sledhouse_table_name') }}
WHERE
  state = 'CA'
Optionally use the AI-Assistant (Copilot) and type a natural-language request, and Sledhouse will suggest SQL statements. You can edit or refine these suggestions as needed.
Click the Run button to get a 100-row sample of your Data Product and a row count. Once happy with the SQL shape of your Data Product and no errors are observed, click save.
NOTE:
• You can define a Data Product while a Sledhouse Table is performing its initial sync.
• However, you won’t be able to preview the query until the sync finishes—the system will let you know when it’s still in progress.
SQL Data Products limitations
Column references require explicit schema browsing or copy-paste
You can browse the schema in the SQL editor and copy column names into your query.
Bobsled does not automatically resolve columns without explicit references.
Improvements are planned to make table/column placement easier, but for now, column references must be manually inserted.
SQL is ANSI standard, but not full platform-specific SQL
You can use ANSI SQL operations (joins, WHERE filters, column selections, aggregates).
Destination-specific SQL extensions (e.g., Snowflake-only functions) may not work as expected.
The current SQL dialect is Snowflake, so consider that while stick to ANSI SQL standard functions.
Formatting is strict
Queries must respect Bobsled’s formatting rules for table references,
{{ sht('...') }}.The SQL editor or AI Copilot can help generate correctly formatted queries.
Pasting a query directly from Snowflake or another warehouse will usually require formatting adjustments.
No native schema migration
If a Sledhouse Table schema changes, the SQL definition won’t auto-update.
You’ll need to review your Data Product definition and backfill if necessary.
SQL Data Products best practices
Use the Copilot: It can auto-generate joins and queries with the correct formatting.
Start with small queries: Validate joins and filters on narrow datasets before scaling.
Paste & clean up: If you have an existing warehouse view, paste it in and use the Copilot to reformat it for Bobsled.
Keep SQL lightweight: Complex transformations are better handled upstream; Data Products should focus on joins, filters, and projections.
Step 2: Save your Data Product
.png)
After clicking Save, and if no errors are found, a modal will appear where you can add extra details:
Data Product:
Name: A unique, internal name also used to reference the Data Product in SQL.
Data Product description:
Descriptionandtags(optional): Internal notes and tags that are not shared with Data Consumers.
Defaults:
Cloud Data Warehouse Target defaults:
Set the
target schemaandtarget nameyour consumers will see.
File Storage Target defaults:
Set the folder
target folder nameand,file format:Parquet (snappy): Snappy compressed Parquet format (default)
CSV (gzip): Gzip-compressed CSV format
JSON (gzip): Gzip-compressed JSON format
In advanced settings, you can adjust the
Unload Strategyto define how files are organized in the destination. The default format follows your provider settings. See our folder structure approach guide for details on folder structure, versioning, and patterns.
Choose scheduling options:
Use the existing sync schedule(selected by default)The Data Product refreshes whenever its underlying Sledhouse Table or Data Product updates. Best for: Data Consumers who need data as soon as it's available.
Set a custom schedule:Choose from
simple intervals: every 5 minutes, 10 minutes, 15 minutes, 30 minutes, hourly, every 2/4/6/12 hours, daily, weekly, or monthly.The Data Product refreshes only at the specified interval, independent of Sledhouse Table updates. Best for: Tiered pricing models based on refresh frequency or cost optimization.
Or set a custom schedule using
CRON:Define precise schedules using CRON expressions (e.g.,
0 17 * * 1for every Monday at 5 PM)Provides maximum flexibility for specific timing requirements. Best for: Complex scheduling requirements aligned with business processes.
No scheduled syncs(snapshot)Delivers data exactly one time and never refreshes again
Creates a static snapshot at a specific point in time
Best for: Trials, POCs, or one-time data deliveries.
Select publish. Data Product successfully defined! You can now share it with a Data Consumer or set one up to begin fulfilling your data. All defaults can be overridden later during the fulfillment process.
NOTE:
• If a SQL-based Data Product references more than one Sledhouse Table, Bobsled will use the first identified Sledhouse Table in the SQL statement to track changes for incremental replication.
Scheduling Data Products prerequisites
For Snowflake Destinations:
Local Copies must be enabled for all Sledhouse Tables referenced by the Data Product in the destination's region. If this is not enabled, the data fulfillment will fail. Boblsled will alert to which underlying Sledhouse Tables need to be locally copied.
Local Copies are Dynamic tables ↗ in Snowflake that support Time Travel.
For File Storage Destinations:
No additional prerequisites—all schedule modes are fully supported.
NOTE:
• The first time a Data Product is added to a share, it syncs immediately regardless of schedule. Subsequent syncs follow the configured schedule.
• Scheduled Data Products allow you to slow down delivery frequency compared to source table updates, but cannot speed up delivery—if a Sledhouse Table syncs daily, hourly Data Product refreshes won't provide fresher data.
How does scheduling Data Products work?
Snowflake Destinations:
Custom schedule Data Products, except for snapshots, are implemented as views using Snowflake Time Travel ↗ to freeze data at specific timestamps, updating only when the schedule is met.
Snapshot Data Products are implemented as tables (not views ↗) to avoid Snowflake's 90-day Time Travel limitation
Both approaches minimize storage costs while providing schedule control
File Storage Destinations:
Data is written to files only when the schedule is met.
No writes occur when the source Sledhouse Table updates outside the schedule.
Reduces storage operations and associated costs.
Managing Data Products
On the Data Product page, you can observe the following tabs:
Settings:
This lets you revisit the configuration (e.g., the SQL and source Sledhouse Table) and make changes
Backfill a Data Product and all of its fulfillments downstream
Delete a Data Product
Data Preview: An on-demand preview of the Data Product with a 100-row sample and a row count.
Schema: Displays all columns set for this Data Product
Previewing Data Product data
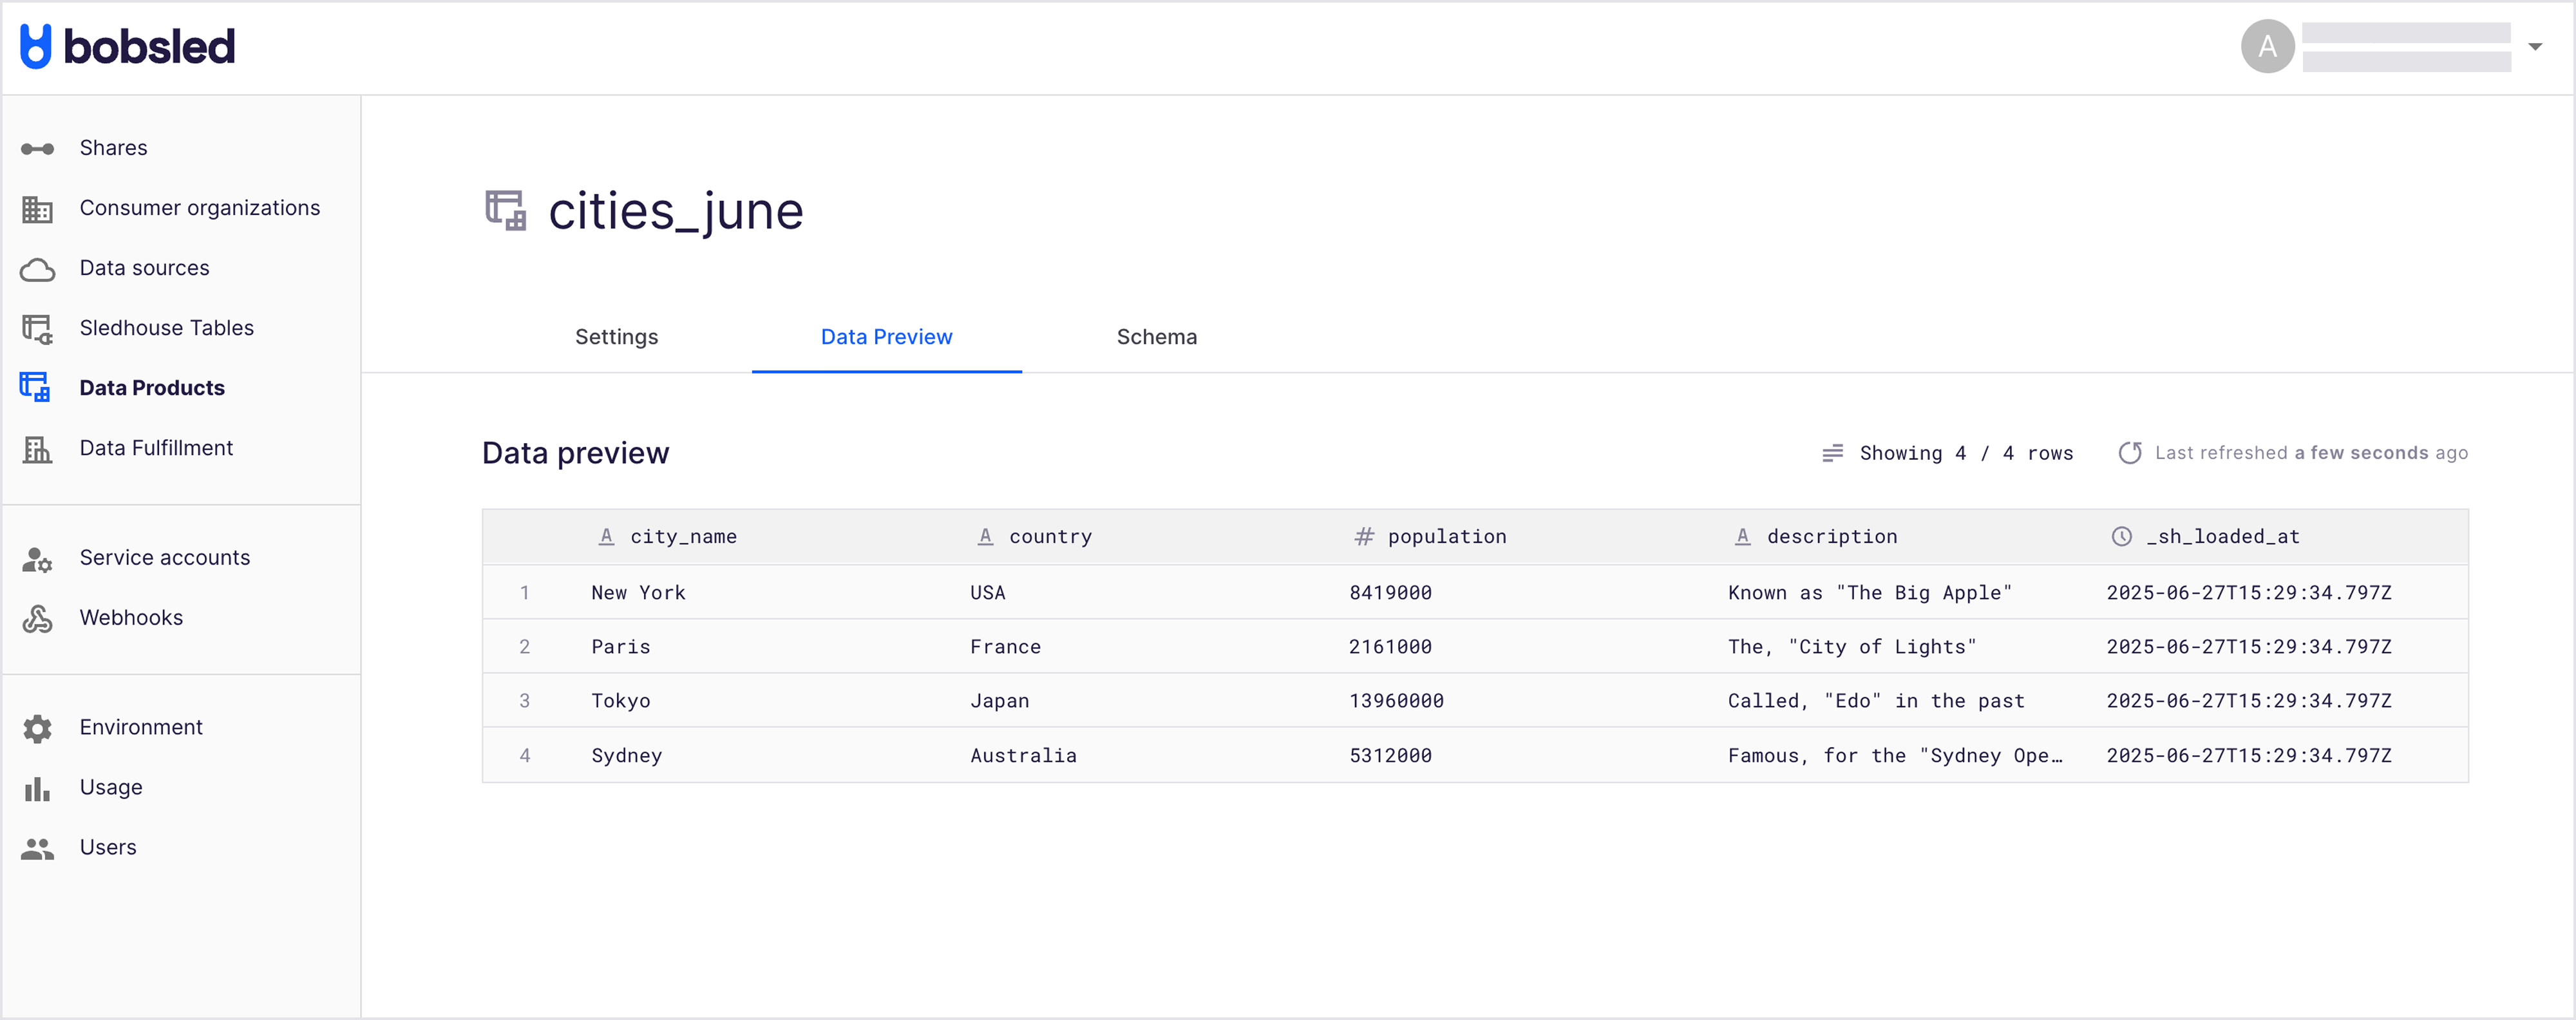
Locate and select the ‘Data Preview’ tab. Bobsled will render a sample and the total rows, and the last time it was refreshed.
Optionally select the refresh button to get a fresher preview of the data.
Editing a Data Product
Locate and select the ‘Settings’ tab in the Data Product you wish to edit. In the Data Product Configuration section, click the Edit Data Product button.
Perform the desired changes to your Data Product definition, click save, and then Publish.
NOTE:
• Bobsled will recommend a backfill when changes to the Data Product definition would benefit from it This ensures all your Data Consumers receive the latest columns and filters without requiring a new fulfillment.• You can choose to only backfill the Data Product itself, or include any customizations derived from it—such as additional filtering for a specific Data Consumer.
Editing a Data Product Schedule
Navigate to the Data Product's Settings tab
Click Edit Data Product
In the save modal, modify the schedule to the desired sync cadence
Click Save and Publish
NOTE:
• For Snowflake destinations: Changing from a scheduled mode to "snapshot" will drop the existing view and create a table instead if fulfilled. Your data is preserved during this transition.
• For File Storage destinations: Schedule changes take effect on the next scheduled sync.
Manually backfilling a Data Product
In the Settings tab of the Data Product you want to backfill, select Backfill Data Product.
Review the backfill details. You can optionally choose to include any downstream Data Products—fulfilled customizations derived from this Data Product.
Select Yes, backfill. Your request will be queued and will start shortly.
TIP:
• While an upstream backfill—triggered at the Sledhouse Table—can also trigger a Data Product backfill, running the backfil at the Data Product level is more focused.
• This is recommended if substantial changes have been made to the Data Product definition or if you want your Data Consumers to receive a fresh copy.NOTE:
• You can currently observe a Data Product backfill only in the Data Consumer logs for any fulfilled Data Product.
Delete a Data Product
Locate the Data Product you wish to delete, and click on the name to enter its detail page.
In the ‘settings’ tab, scroll down.
Click on the ‘Delete Data Product’ button at the bottom.
NOTE:
• Bobsled prevents the deletion of any Data Product that has any fulfilled Data Consumers by it.• To proceed with deletion, all related fulfilled Data Products must first be unshared.
• For your convenience, Bobsled lists and links all dependencies to help you manage this process efficiently.