This article provides you with a step-by-step guide on how to get started with Bobsled Sledhouse to create Sledhouse Tables.
Prerequisites
Bobsled Account: You must have access to Bobsled’s main application and the Sledhouse tab/feature enabled in your environment.
To successfully create a Sledhouse Table, you must have at least one Data source preconfigured in Bobsled.
NOTE:
What you can see and do will differ based on your role and permissions.
Setup Instructions
Step 1: Choose Source
In the Bobsled Application, locate and select the Sledhouse Tables Tab, then select the “Create Sledhouse Table” button
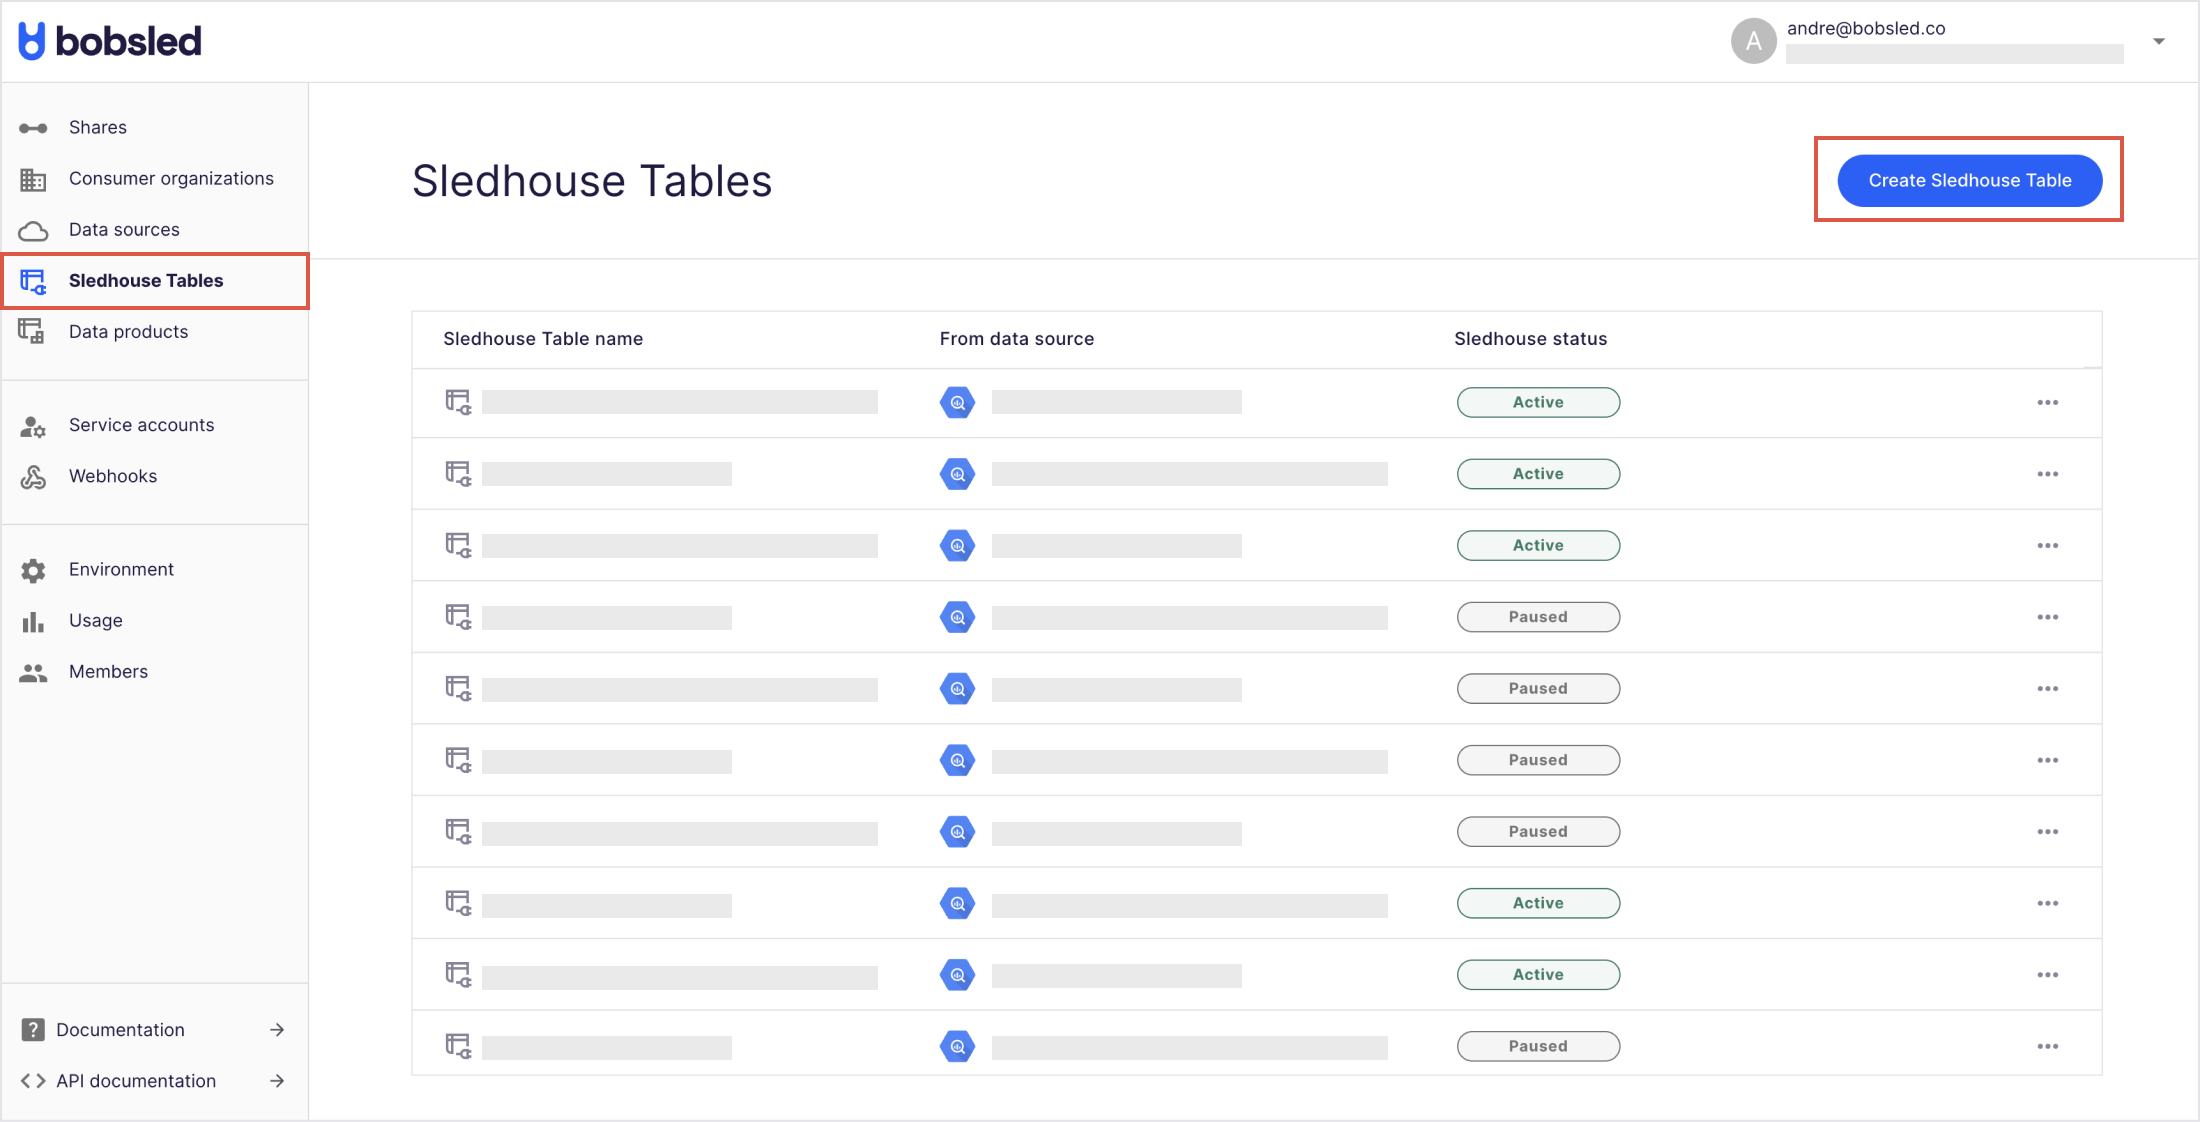
In the wizard, select the data source you have configured before (e.g., BigQuery)
Choose a table from the list and click “continue.”
Step 2: Configure Sledhouse Table
Choose a
namefor your Sledhouse Table (A unique, internal name also used to reference it in SQL) and optionally add adescriptionandtags.Review your schema and confirm the column structures following Bobsled data types
.png)
Set a replication pattern for your Sledhouse Table:
Append: Every new record in the source is appended
Update & Append: Provide a unique identifier and a “last updated” timestamp to merge changes
Overwrite: Replace the table each time with a full snapshot.

TIP:
• The available replication patterns work in the same was as in Cloud Data Warehouse Sources to Cloud Data Warehouse Destination in Bobsled transfers.
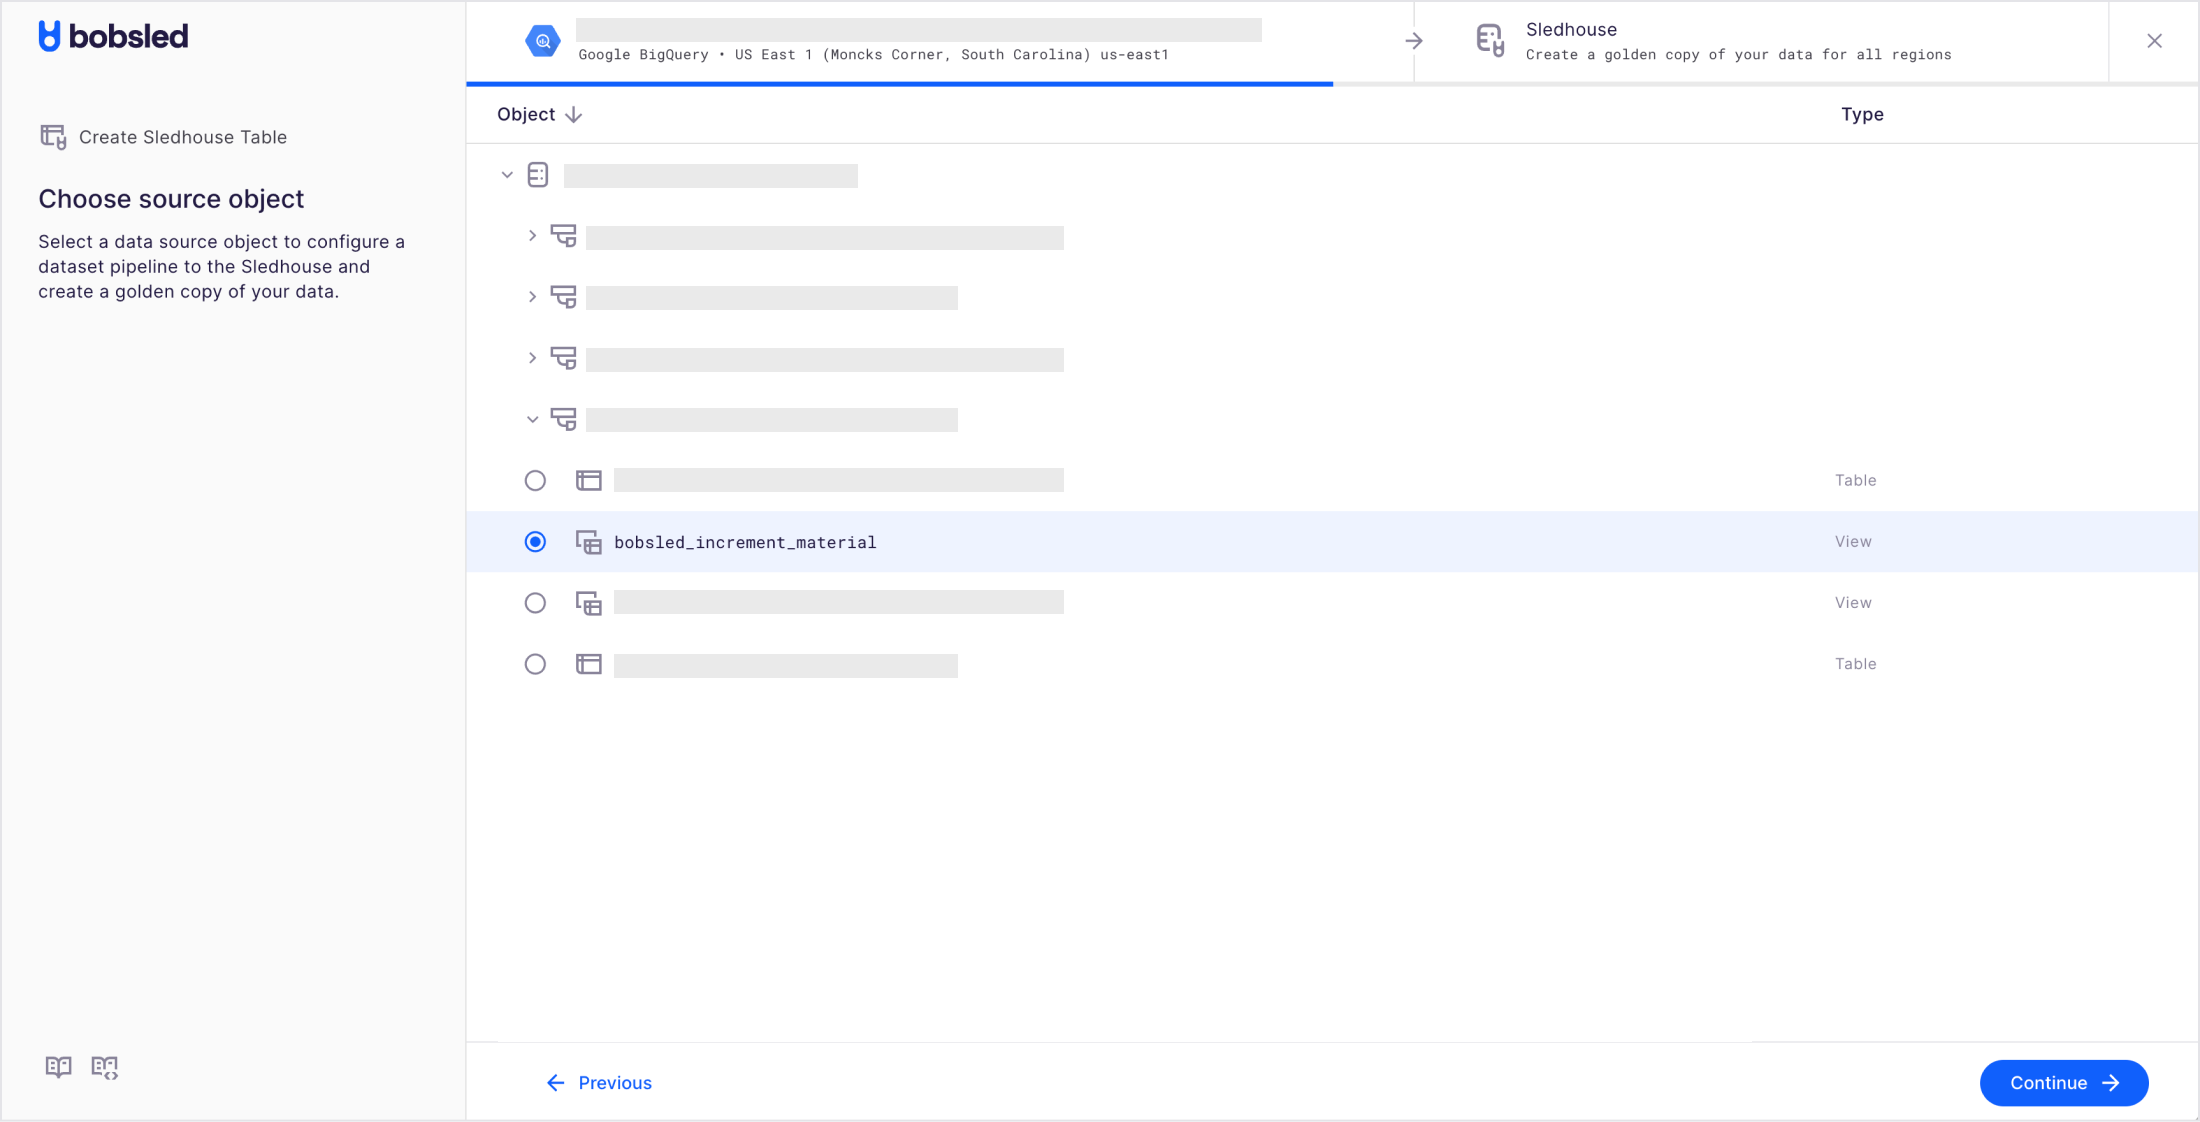
Optionally set Partitioning for the Sledhouse Table.
Choose one or more columns to partition for performance optimization. If you anticipate frequent queries filtered by a specific column (e.g.,
state,zip_code, orevent_date), use it as a partition key to speed up downstream queries.
TIP:
• Large datasets will significantly benefit from partitioning.
• When using time-based data types, Bobsled offers transformation options to tune the right field cardinality by choosing the right timeframe to partition by (hour, day, month, year).NOTE:
• Clustering/zOrder support—in addition to partitioning—is coming soon to give further performance tuning options.
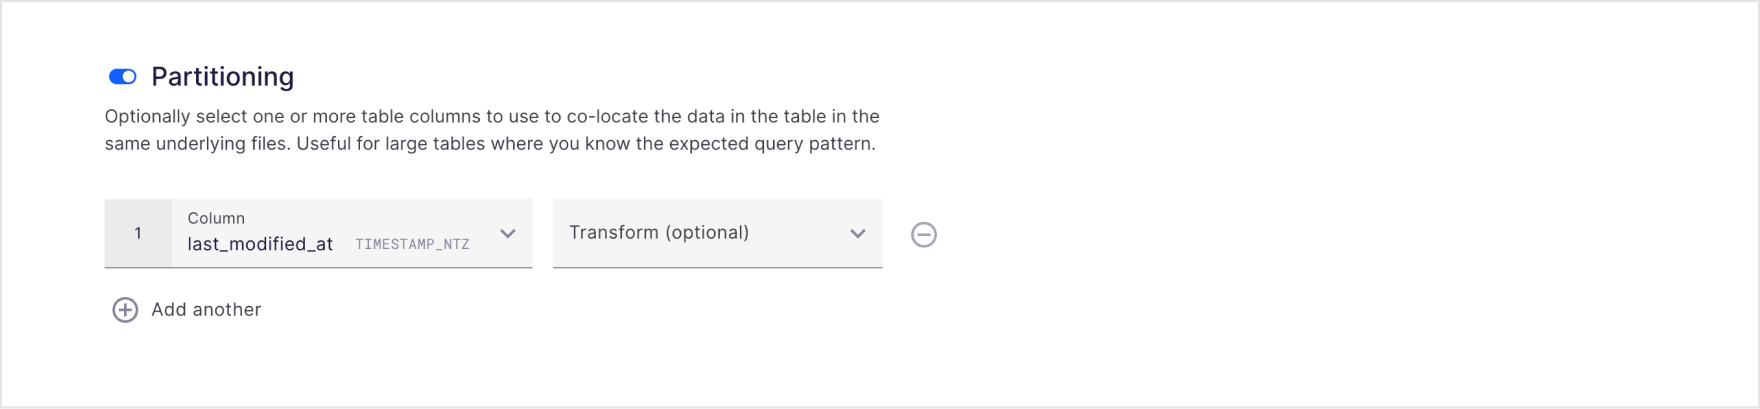
Set the scheduling options.
Currently, Sledhouse runs a default hourly sync
Bobsled offers two ways of setting syncing preferences:
Simple scheduler (a set of fixed intervals up to 1-month cadence) and,
Cron scheduler (an advanced scheduling tool to suit your operational needs).
NOTE:
• Sledhouse defaults to hourly syncs and does not support intervals shorter than one hour. If you require more frequent syncs, please contact your account team.• Bobsled Cron scheduler uses UNIX cron syntax ↗
Once happy with your Sledhouse Table settings, click “Continue“
Step 3: Review Sledhouse Table
Review your Sledhouse Table configuration and click “Save.” You have successfully set up a Sledhouse Table!
Your Sledhouse Table will be queued and start syncing within the next 5 minutes. To expedite and sync immediately, locate and select ‘Sync now’.
.png)
NOTE:
For Sledhouse Tables with a sync frequency set to ‘transfer once’, the ‘Sync now’ button must be manually trigerred.
Managing Sledhouse Tables
On the Sledhouse Table page, you can review the state of the pipeline, and also:
Schema: Displays all columns replicated from the source, eventually enabling type casting or other transformations
Data preview: On-demand sample of 100 rows and total row count of the Sledhouse Table.
Sledhouse logs: Shows ongoing and past replication jobs, with status and potential errors
Settings: Allows you to review the configuration (e.g., replication pattern, partitioning) and make changes.
Previewing Sledhouse Table Data
Locate and select the ‘Data Preview’ tab. Bobsled will render a sample and the total rows, and the last time it was refreshed.
Optionally select the refresh button to get a fresher preview of the data.
.png)
NOTE:
While performing the initial sync of your Sledhouse Table, previewing your data is not possible. The system will alert you while this action is not possible.
Monitoring a Sledhouse Table
Locate and select the ‘Sledhouse Table Logs’ tab. Bobsled will render the user and system operations registered. For more details on the available events, visit the Logs overview section.
.png)
NOTE:
Currently the log list doesn’t update dynamically. In order to check for new events, a manual refresh to the browser must be triggred.
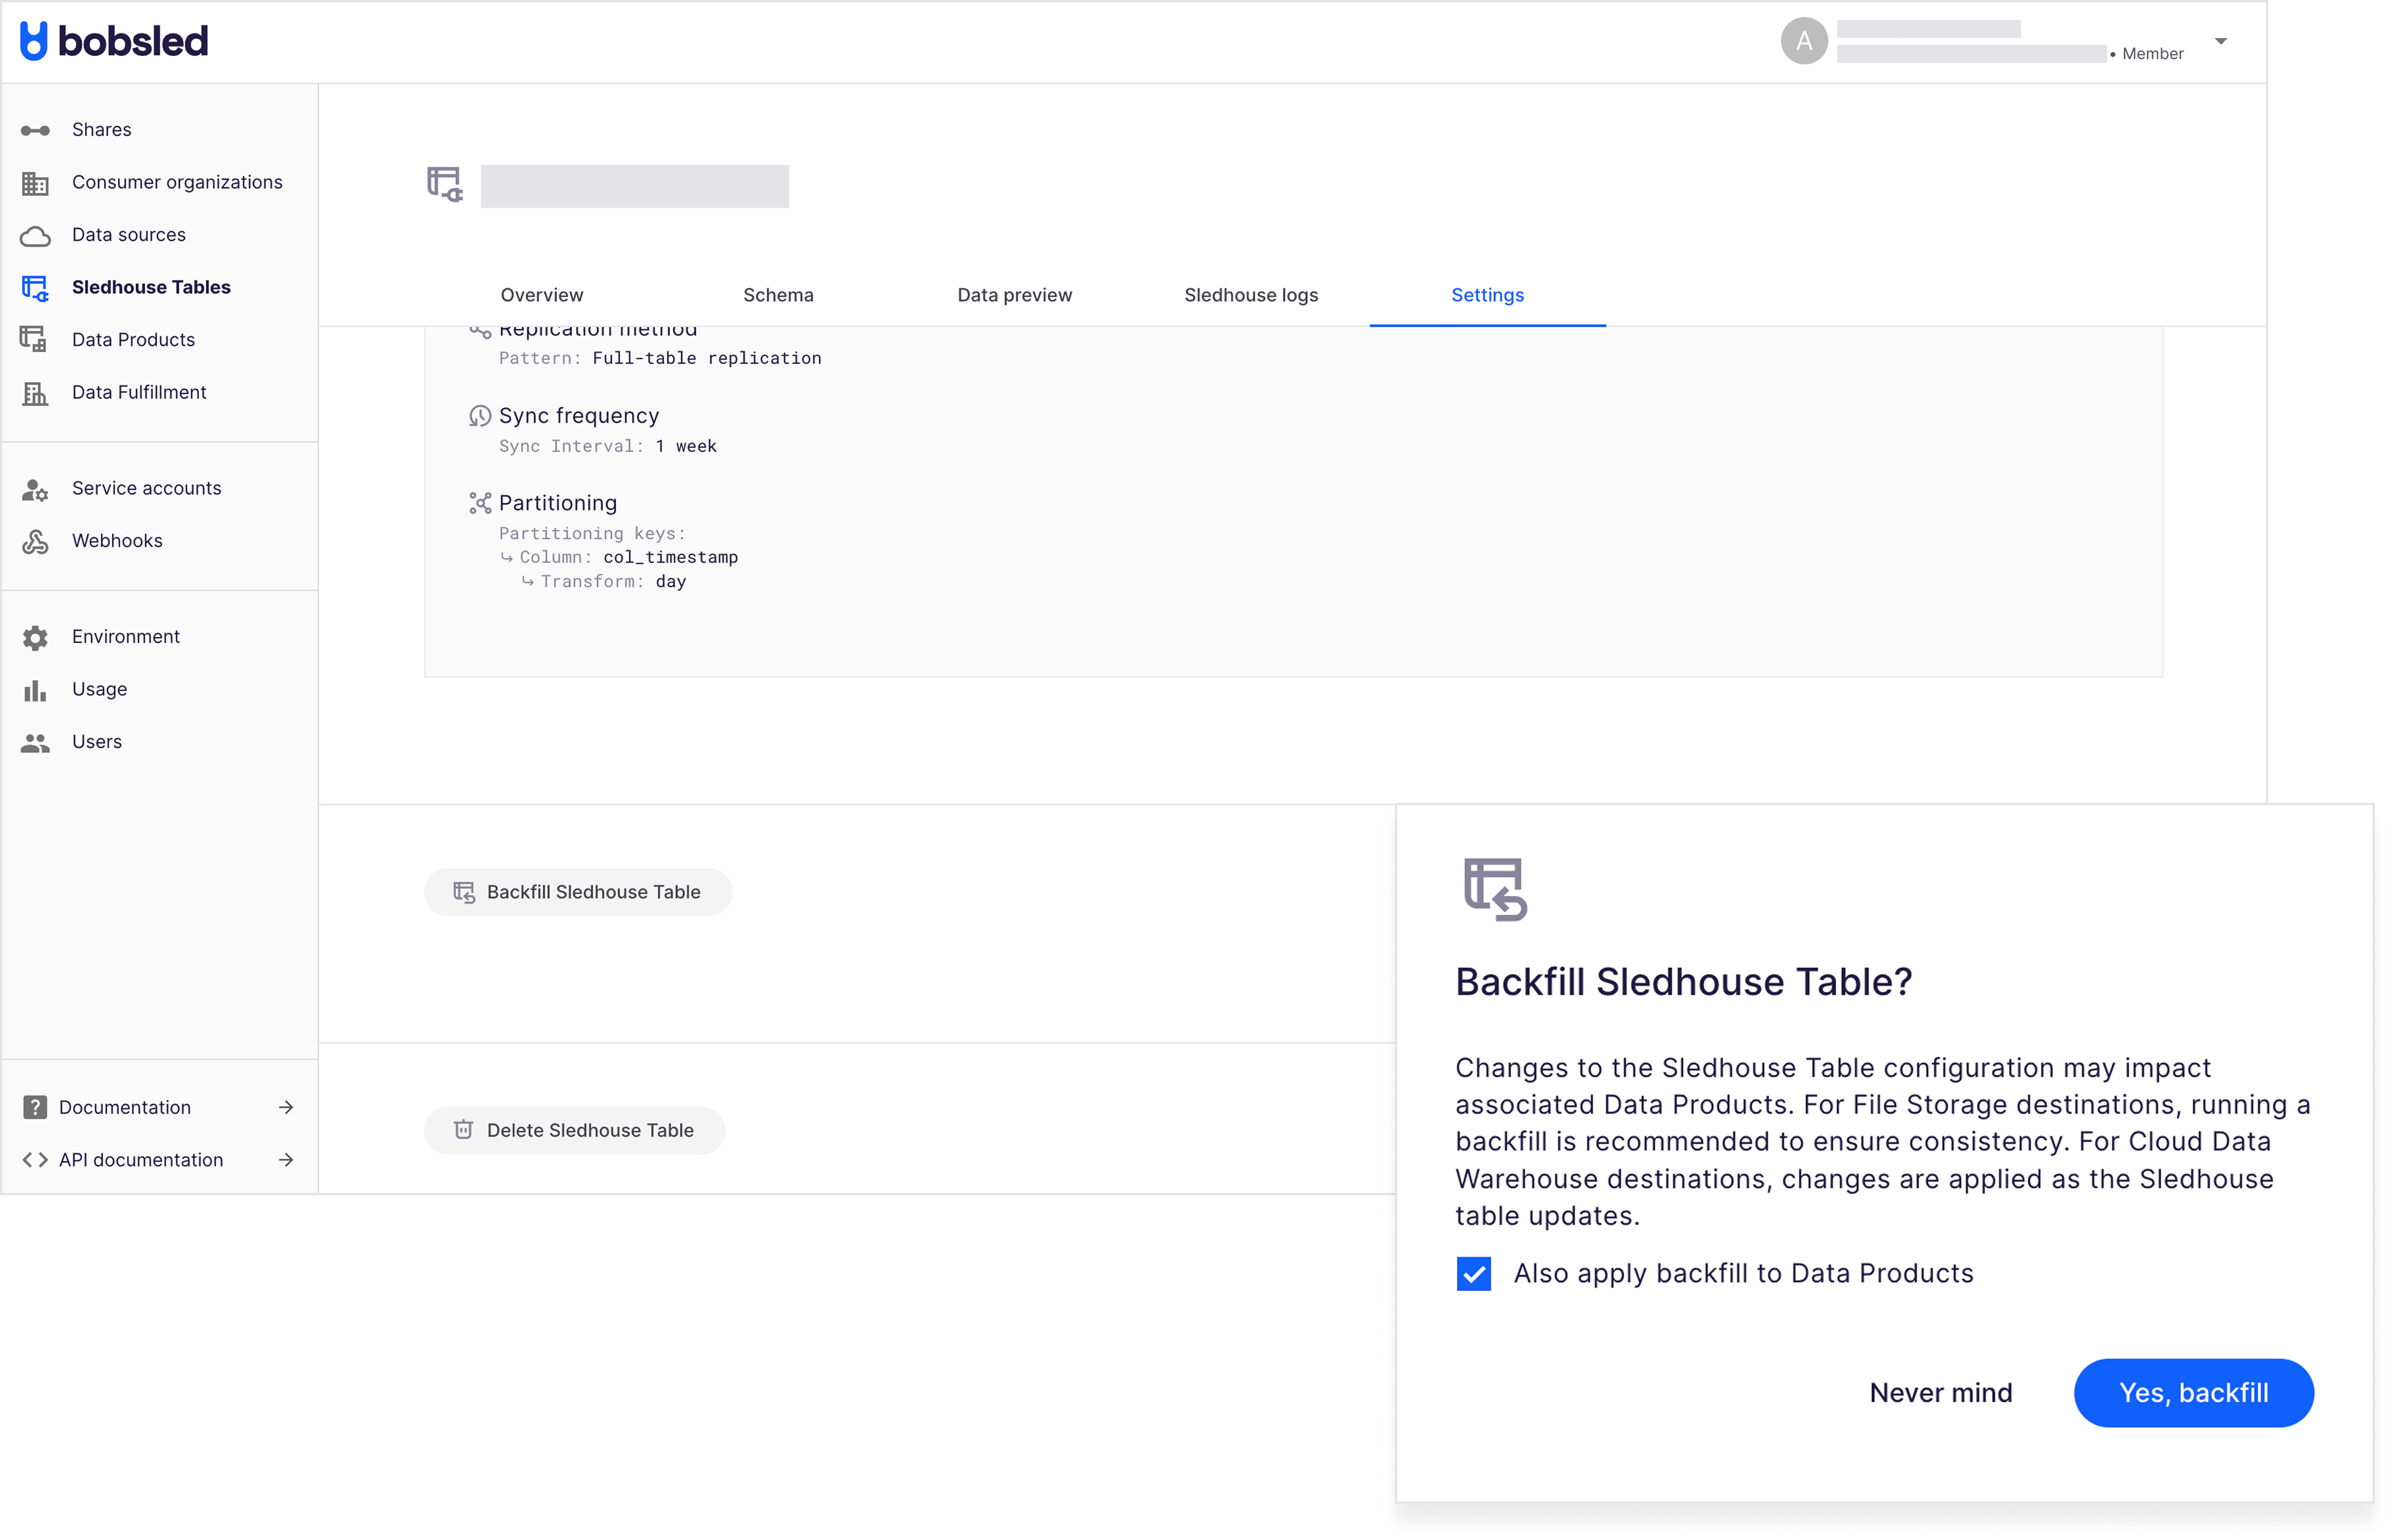
Manually backfill a Sledhouse Table
Locate and select the ‘Settings’ tab. Under the Sledhouse Table Configuration section, click the Backfill Sledhouse Table button.
Read the text carefully, and optionally opt in or out to backfill all Data Products derived from this Sledhouse Table, and select Yes, backfill.
Your backfill request will be queued and will start shortly. You can observe the backfill progress via the logs.
NOTE:
• For more about backfilling Sledhouse Tables and Data Products, see the Backfilling in Sledhouse article—it explains when Bobsled recommends a backfill and when it’s a good general practice.
• If Local copies are enabled in your environment, backfilling a Sledhouse Table will also trigger a backfill for all local copies.
Delete a Sledhouse Table
Locate the Sledhouse Table you wish to delete, and click on the name to enter its detail page.
Click on the ‘settings’ tab and scroll down.
Click on the ‘Delete Sledhouse Table’ button at the bottom.
NOTE:
• Bobsled prevents the deletion of any Sledhouse Table that has published Data Products associated with it.
• To proceed with deletion, all related Data Products must first be removed.
• Users may delete a Sledhouse Table regardless of status, including Sledhouse tables currently in status syncing.
• For your convenience, Bobsled lists and links all dependent Data Products to help you manage this process efficiently