This article will describe how to configure Bobsled to grant access to data in Snowflake. The data will be delivered to the Bobsled-managed destination, and access will be authorized to the provided Snowflake account.
Prerequisites
For Bobsled transfers, configuring a destination requires a share to have been created.
For Data Fulfillment in Sledhouse, this feature must be enabled in your environment.
Bobsled requires that you provide the following information for your Snowflake ADMIN ↗ account's:
Organization nameAccount nameRegion
To learn more about Snowflake accounts and how to find them, please visit: Account Access Identifiers in Snowflake
Set up instructions via a Share in Bobsled Transfers
On the share page, click the box Pick Destination
Choose Snowflake, choose your Platform, and choose the region of the target Cloud Data Warehouse. Click Continue.
.png "snf-d-1(2).png")
Enter your customer's
Snowflake organization nameandSnowflake account nameand click Grant Access.

TIP:
For more information where your customers can find these IDs, please refer to Account Access Identifiers in Snowflake.
Select Finish to save. You’ve successfully granted set-up access.
After setting up the destination in a Share and picking a source, you can get started and create a data transfer to share data with your consumers.
Set up instructions via Data Fulfillment in Sledhouse
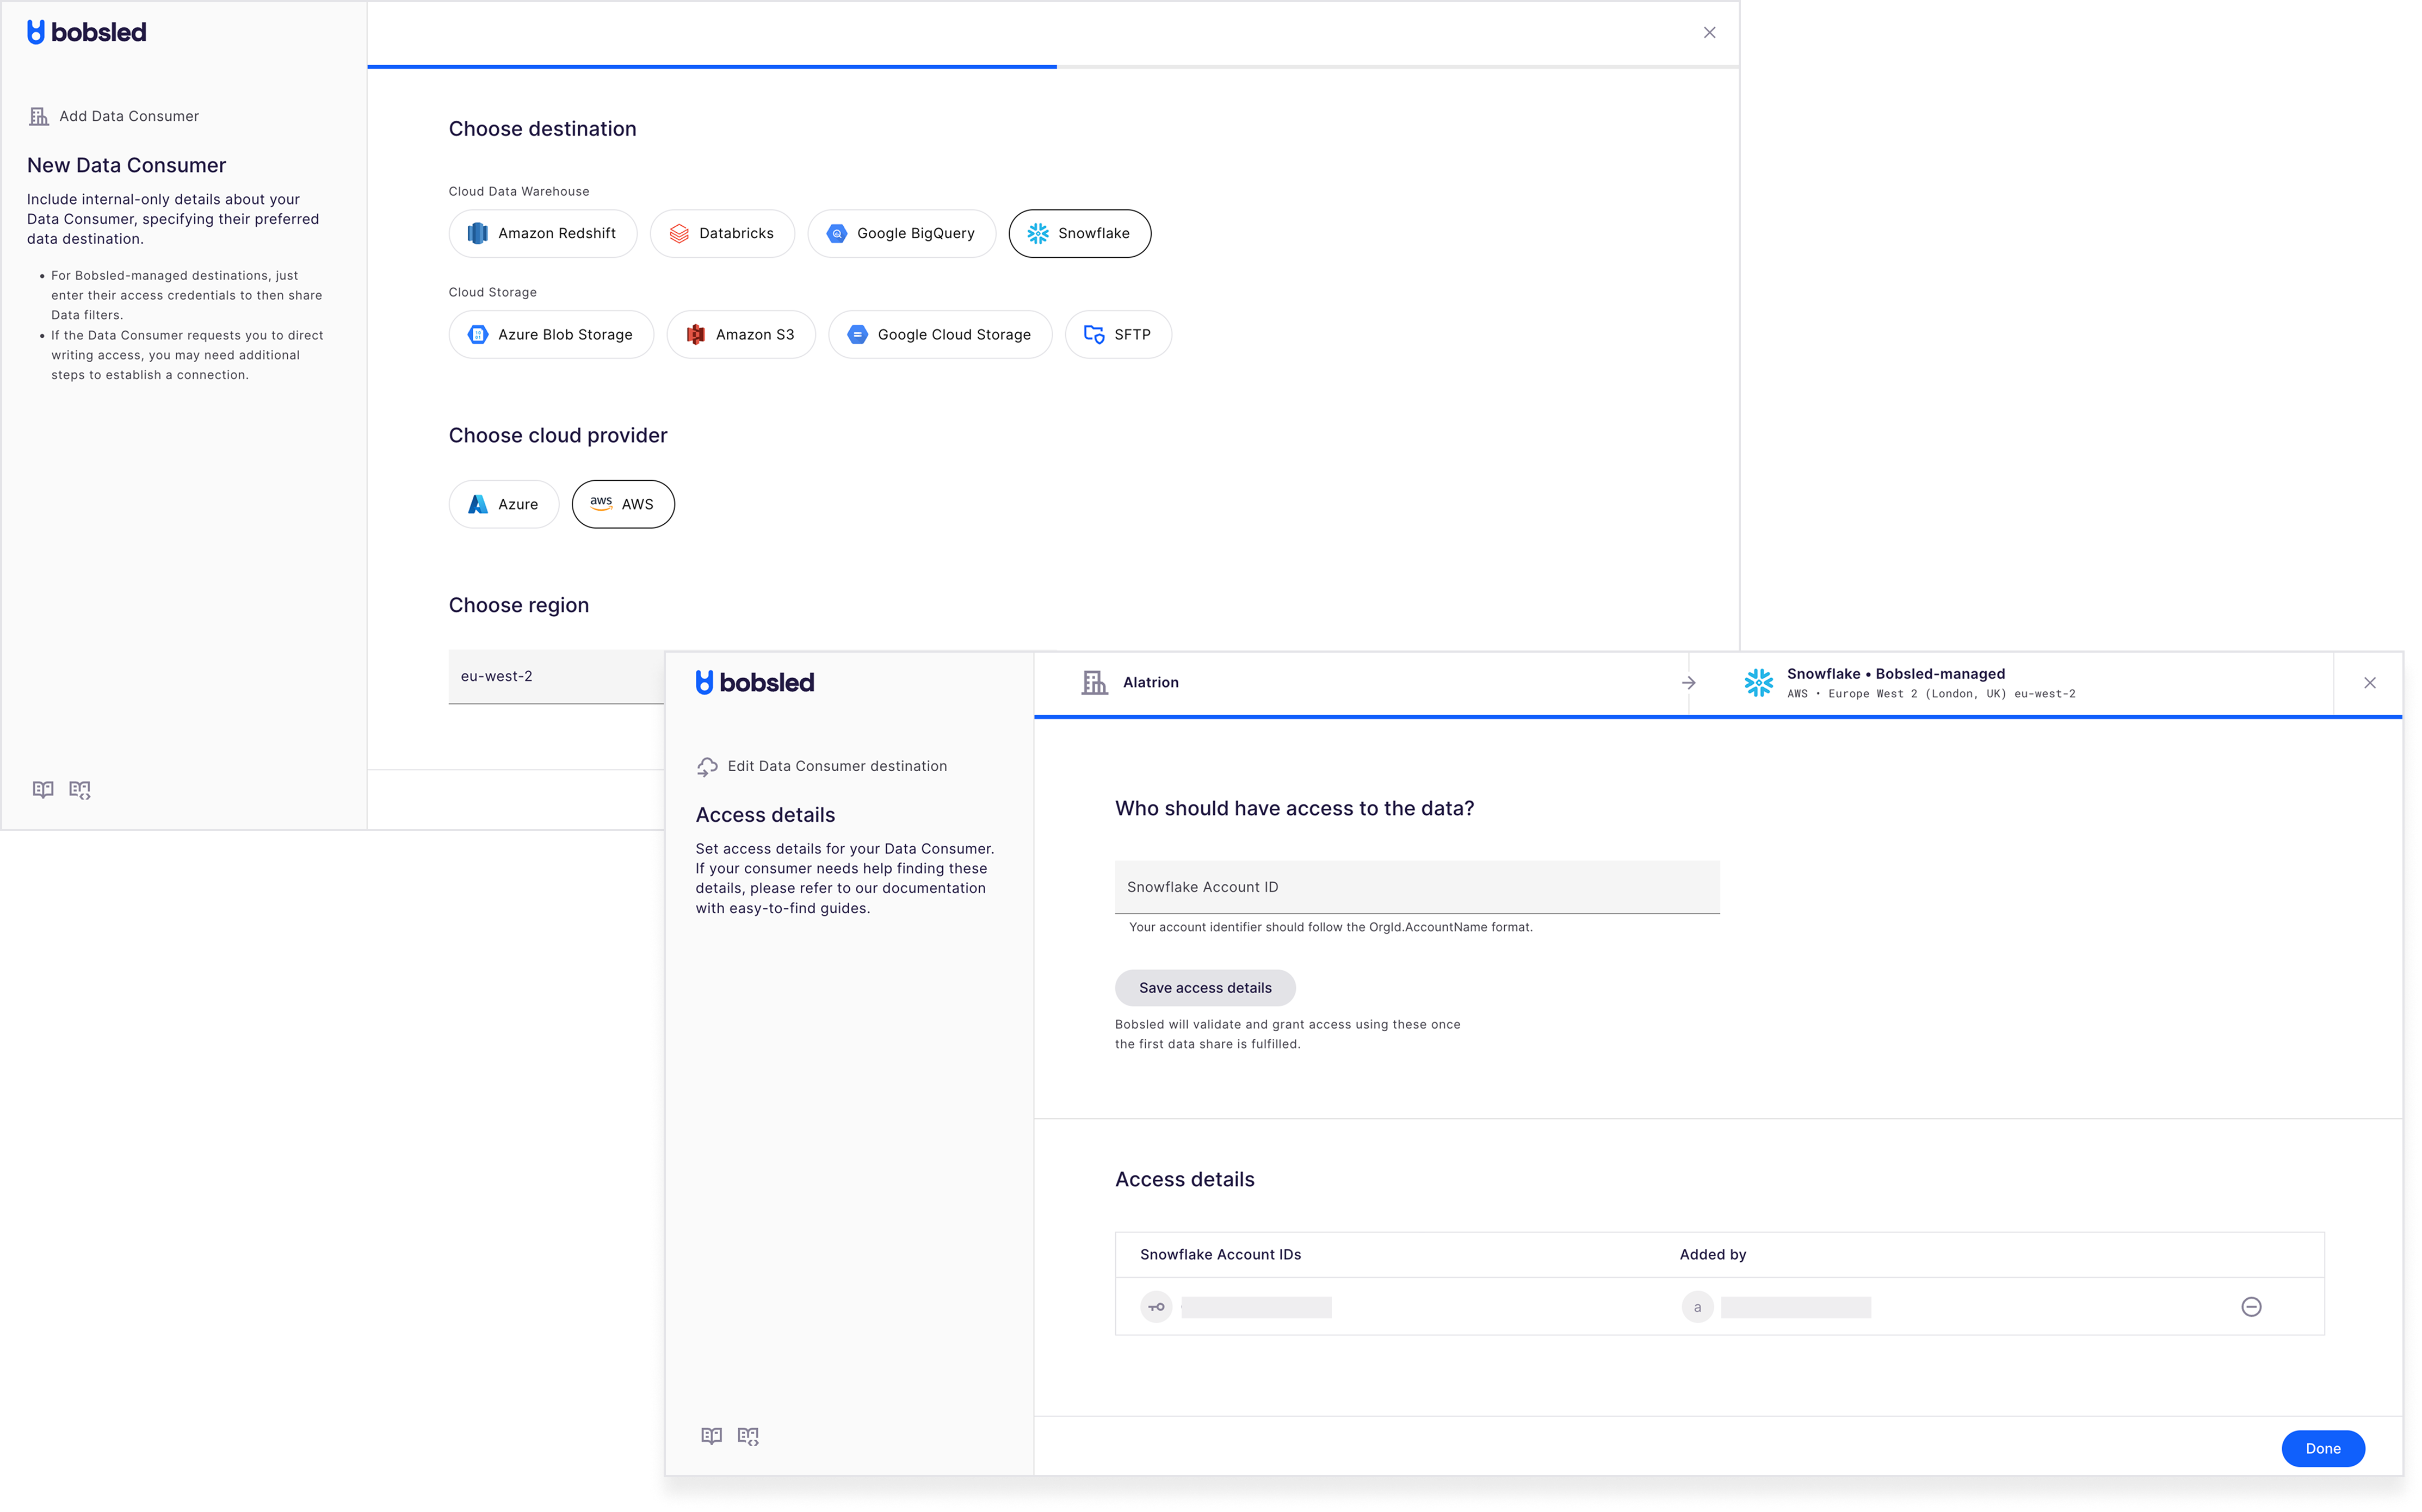
When setting up a new Data Consumer, enter the details and scroll down.
Choose Snowflake, the cloud platform, and the region of your target destination. Press continue.
Enter your Snowflake Account ID (
OrgId.AccountName) and click ‘Save access details’. For more information on where your customers can find these IDs, please refer to Account Access Identifiers in Snowflake.You've now successfully set up access.
After setting up the destination, you can get started and fulfill Data Products with your Data Consumer.