This article will describe the steps for a Provider to configure Bobsled access to a Databricks workspace to be used as a source in Bobsled.
Availability: Databricks as a source is currently supported only for Sledhouse (Sledhouse Tables and Data Products). It is not yet available as a source for Bobsled Transfers. If you need Databricks as a source for Transfers, reach out to your Bobsled account team.
Prerequisites
A Databricks workspace on AWS, Azure, or GCP with Unity Catalog enabled.
Access to a Databricks user with the privileges required to create recipients and create/modify shares in Unity Catalog.
Setup instructions
Step 1: Create an Open Sharing recipient in Databricks
In your Databricks workspace, open the Catalog explorer and navigate to Delta Sharing → Shared by me.
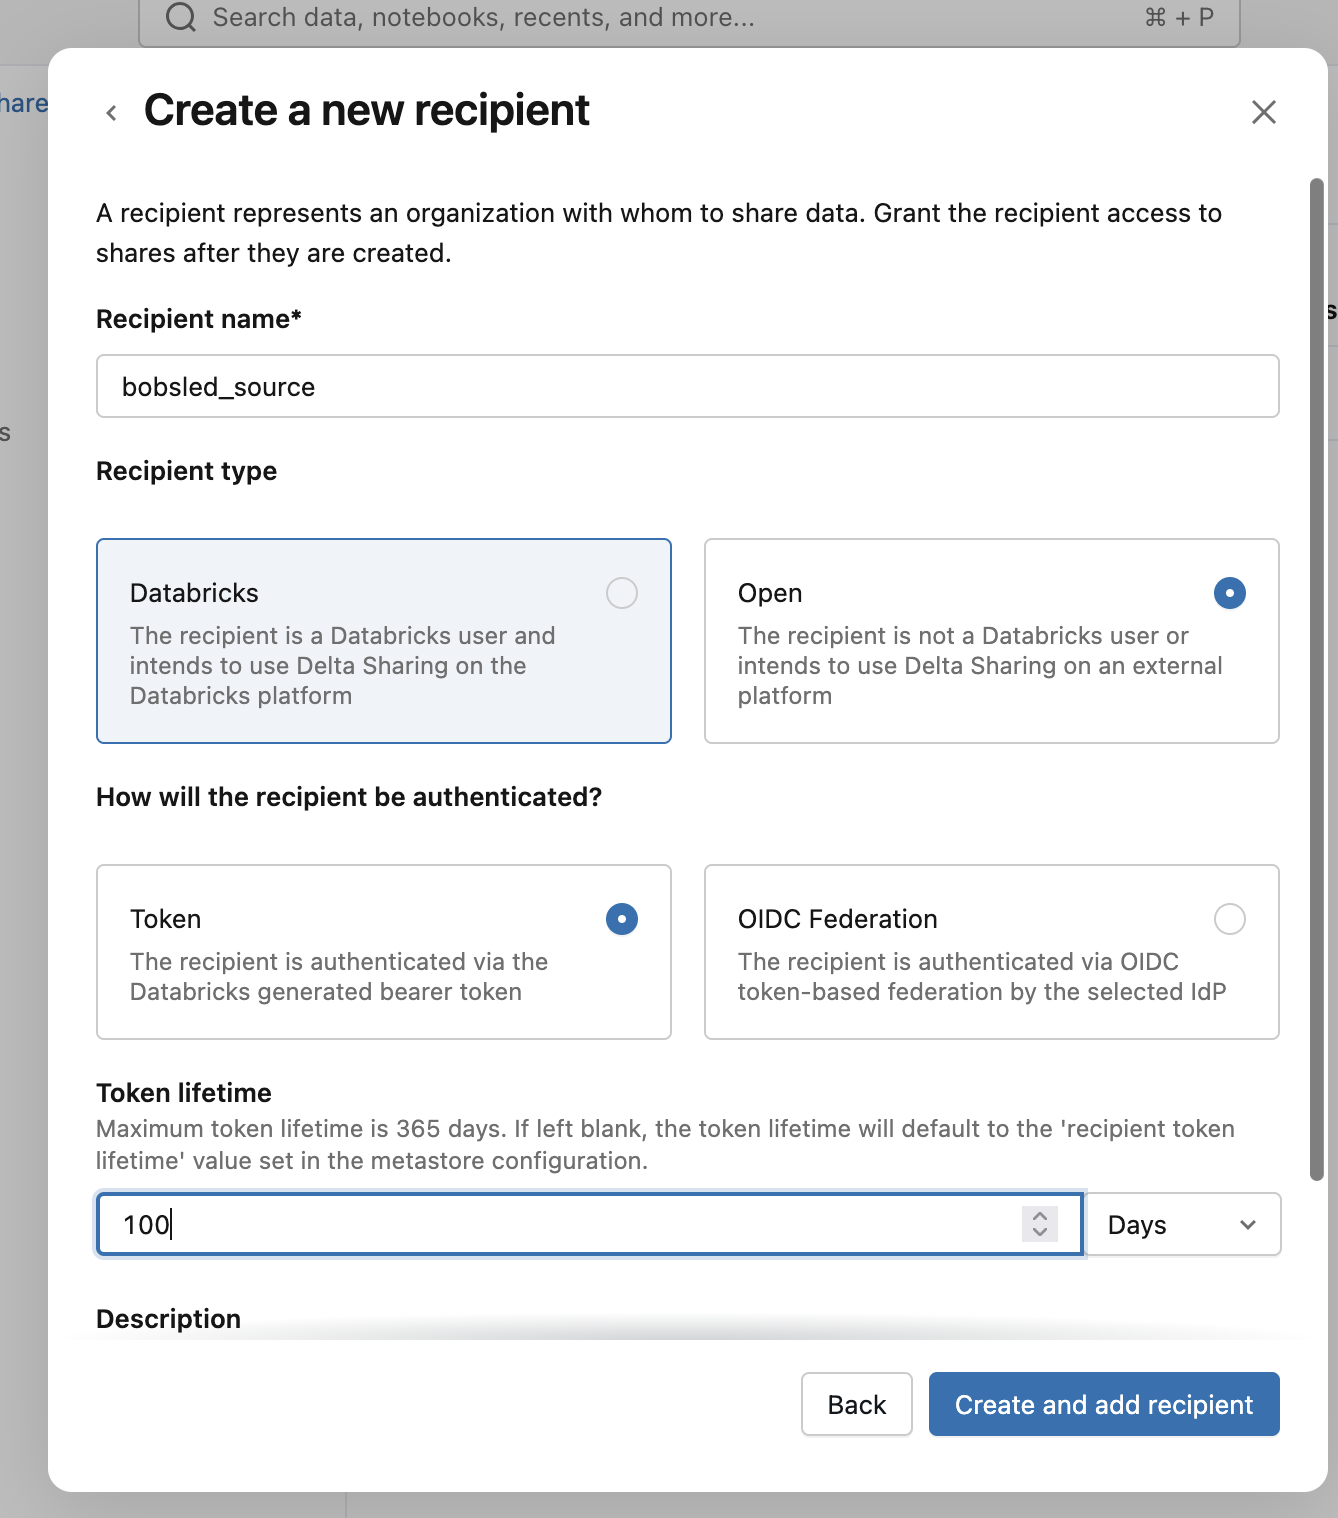
Click the Recipients tab, then click New recipient.
Provide a Recipient name (e.g.
bobsled_source).For Recipient type, select Open and Token. Set the token lifetime: Open Sharing tokens have an expiration set at recipient creation time. Set this long enough to cover your expected usage, or plan to rotate it.
Click Create.
Databricks will display an Activation link (a URL containing an embedded token) with an expiration time. Copy the activation link — you will paste this into Bobsled in Step 3. You will not be able to retrieve the same link again after closing the dialog; if you lose it, you can rotate the token on the recipient to generate a new one.

Rotating the recipient token
If the activation link is leaked, expired, or otherwise needs to be rotated, rotate the token on the recipient in Databricks (Shared by me → Recipients → your recipient → Rotate token). This produces a new activation link. Edit the Bobsled source and paste in the new link.
Step 2: Create a Delta Share granted to the recipient
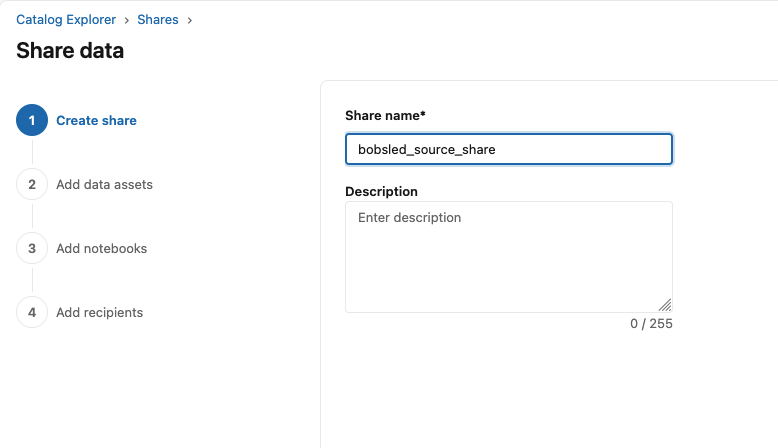
Still under Delta Sharing → Shared by me, click Share Data.
Provide a Share name (e.g.
bobsled_share). Write this name down — you will enter it into Bobsled in Step 4.Open the newly created share and click Manage assets → Add data assets.
Select the tables, views, or schemas you want to send to Bobsled, and confirm. You can return here later to add or remove assets.
You can leave the “Add notebooks” step blank, and click Save and continue.
In the Add recipients step, add the newly created Bobsled recipient. Click Share data to finish creating the share.
Delta Sharing limitation — no cross-share references:
Tables and views added to a Delta Share cannot reference data from another inbound share. This is enforced by Databricks on the delta sharing protocol, on the provider side. If you need to share a view that joins objects from different shares, materialize the result into a table in your own metastore.
At this point your Databricks side is fully configured. You should have two values ready to enter into Bobsled:
The Share name (e.g.
bobsled_share)The Activation link (e.g.
https://<workspace-host>/api/2.0/unity-catalog/public/data_sharing_activation/<token>)
Step 3: Configure source in Bobsled
Log in to your Bobsled Environment.
Select Data Sources in the Left sidebar and then Add source at the top right of the page.
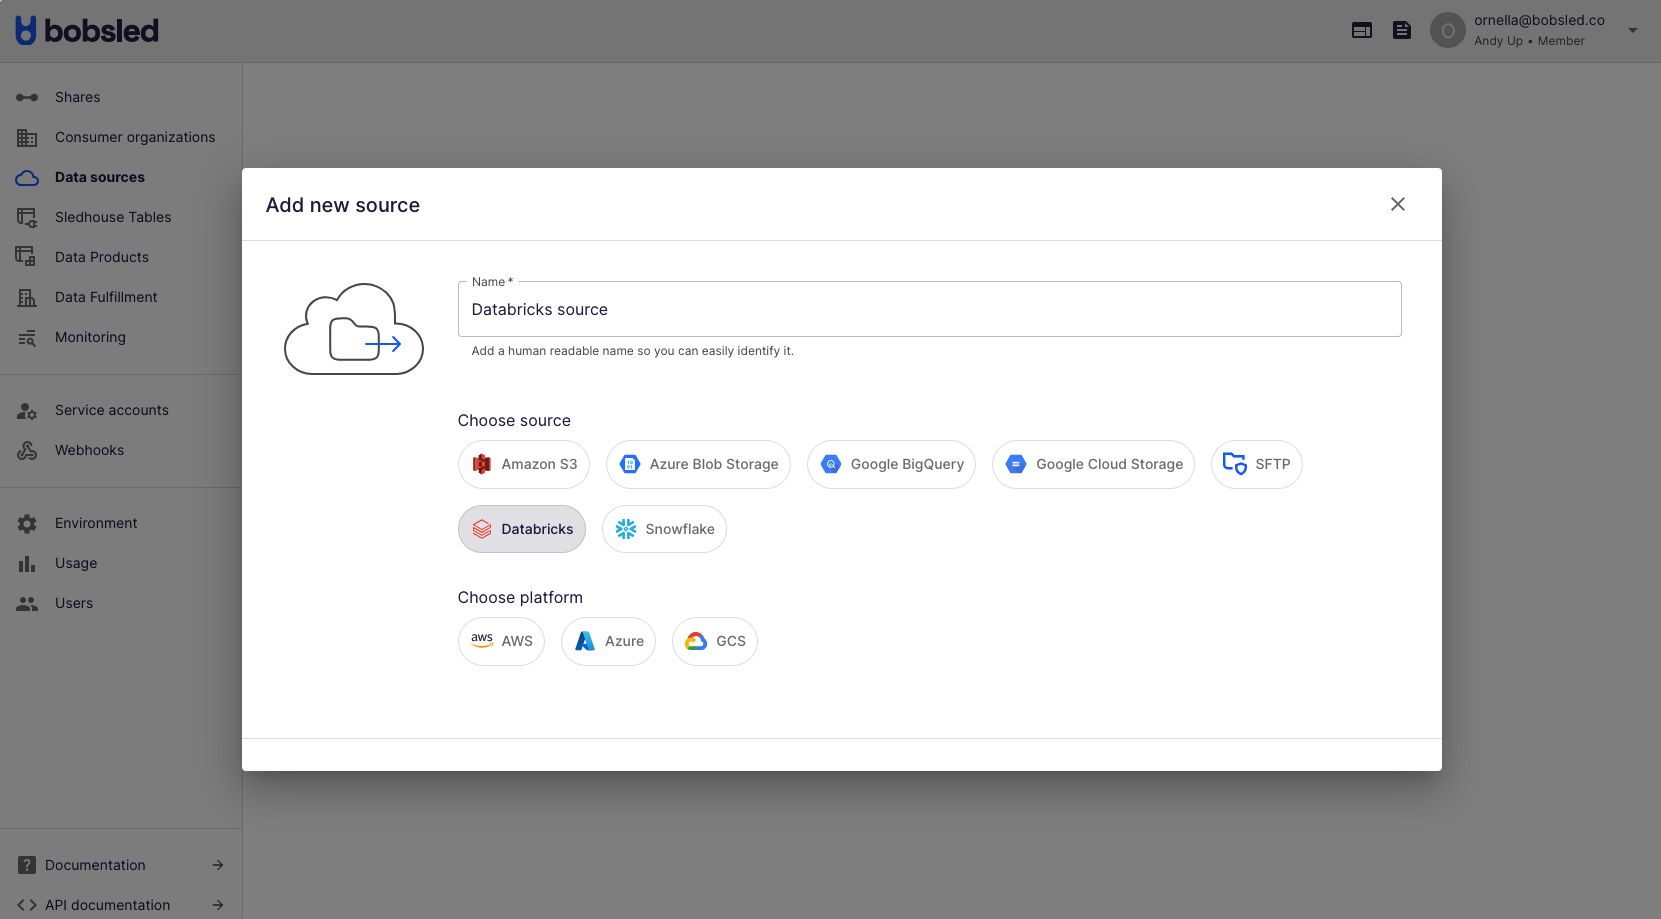
Enter a human-readable name to describe the source.
Select Databricks and the cloud and region of your Databricks account. Click Continue to move to the next step.
Enter the Share name from Step 2 in the
Share Namefield.Paste the Activation link from Step 1 into the
Activation Linkfield.Click Save.
Once you’ve successfully configured your Source, you can start syncing Sledhouse Tables and defining Data Products.