Bobsled can deliver data to an external bucket, housed within a non-Bobsled AWS account. For example, this could be a bucket in the provider's AWS account or in a consumer's AWS account. This provides maximum flexibility and control over the bucket itself. Note that Bobsled does not support AWS GovCloud S3 destinations.
Setup instructions
Step 1: Setting up a share to an external bucket in Bobsled
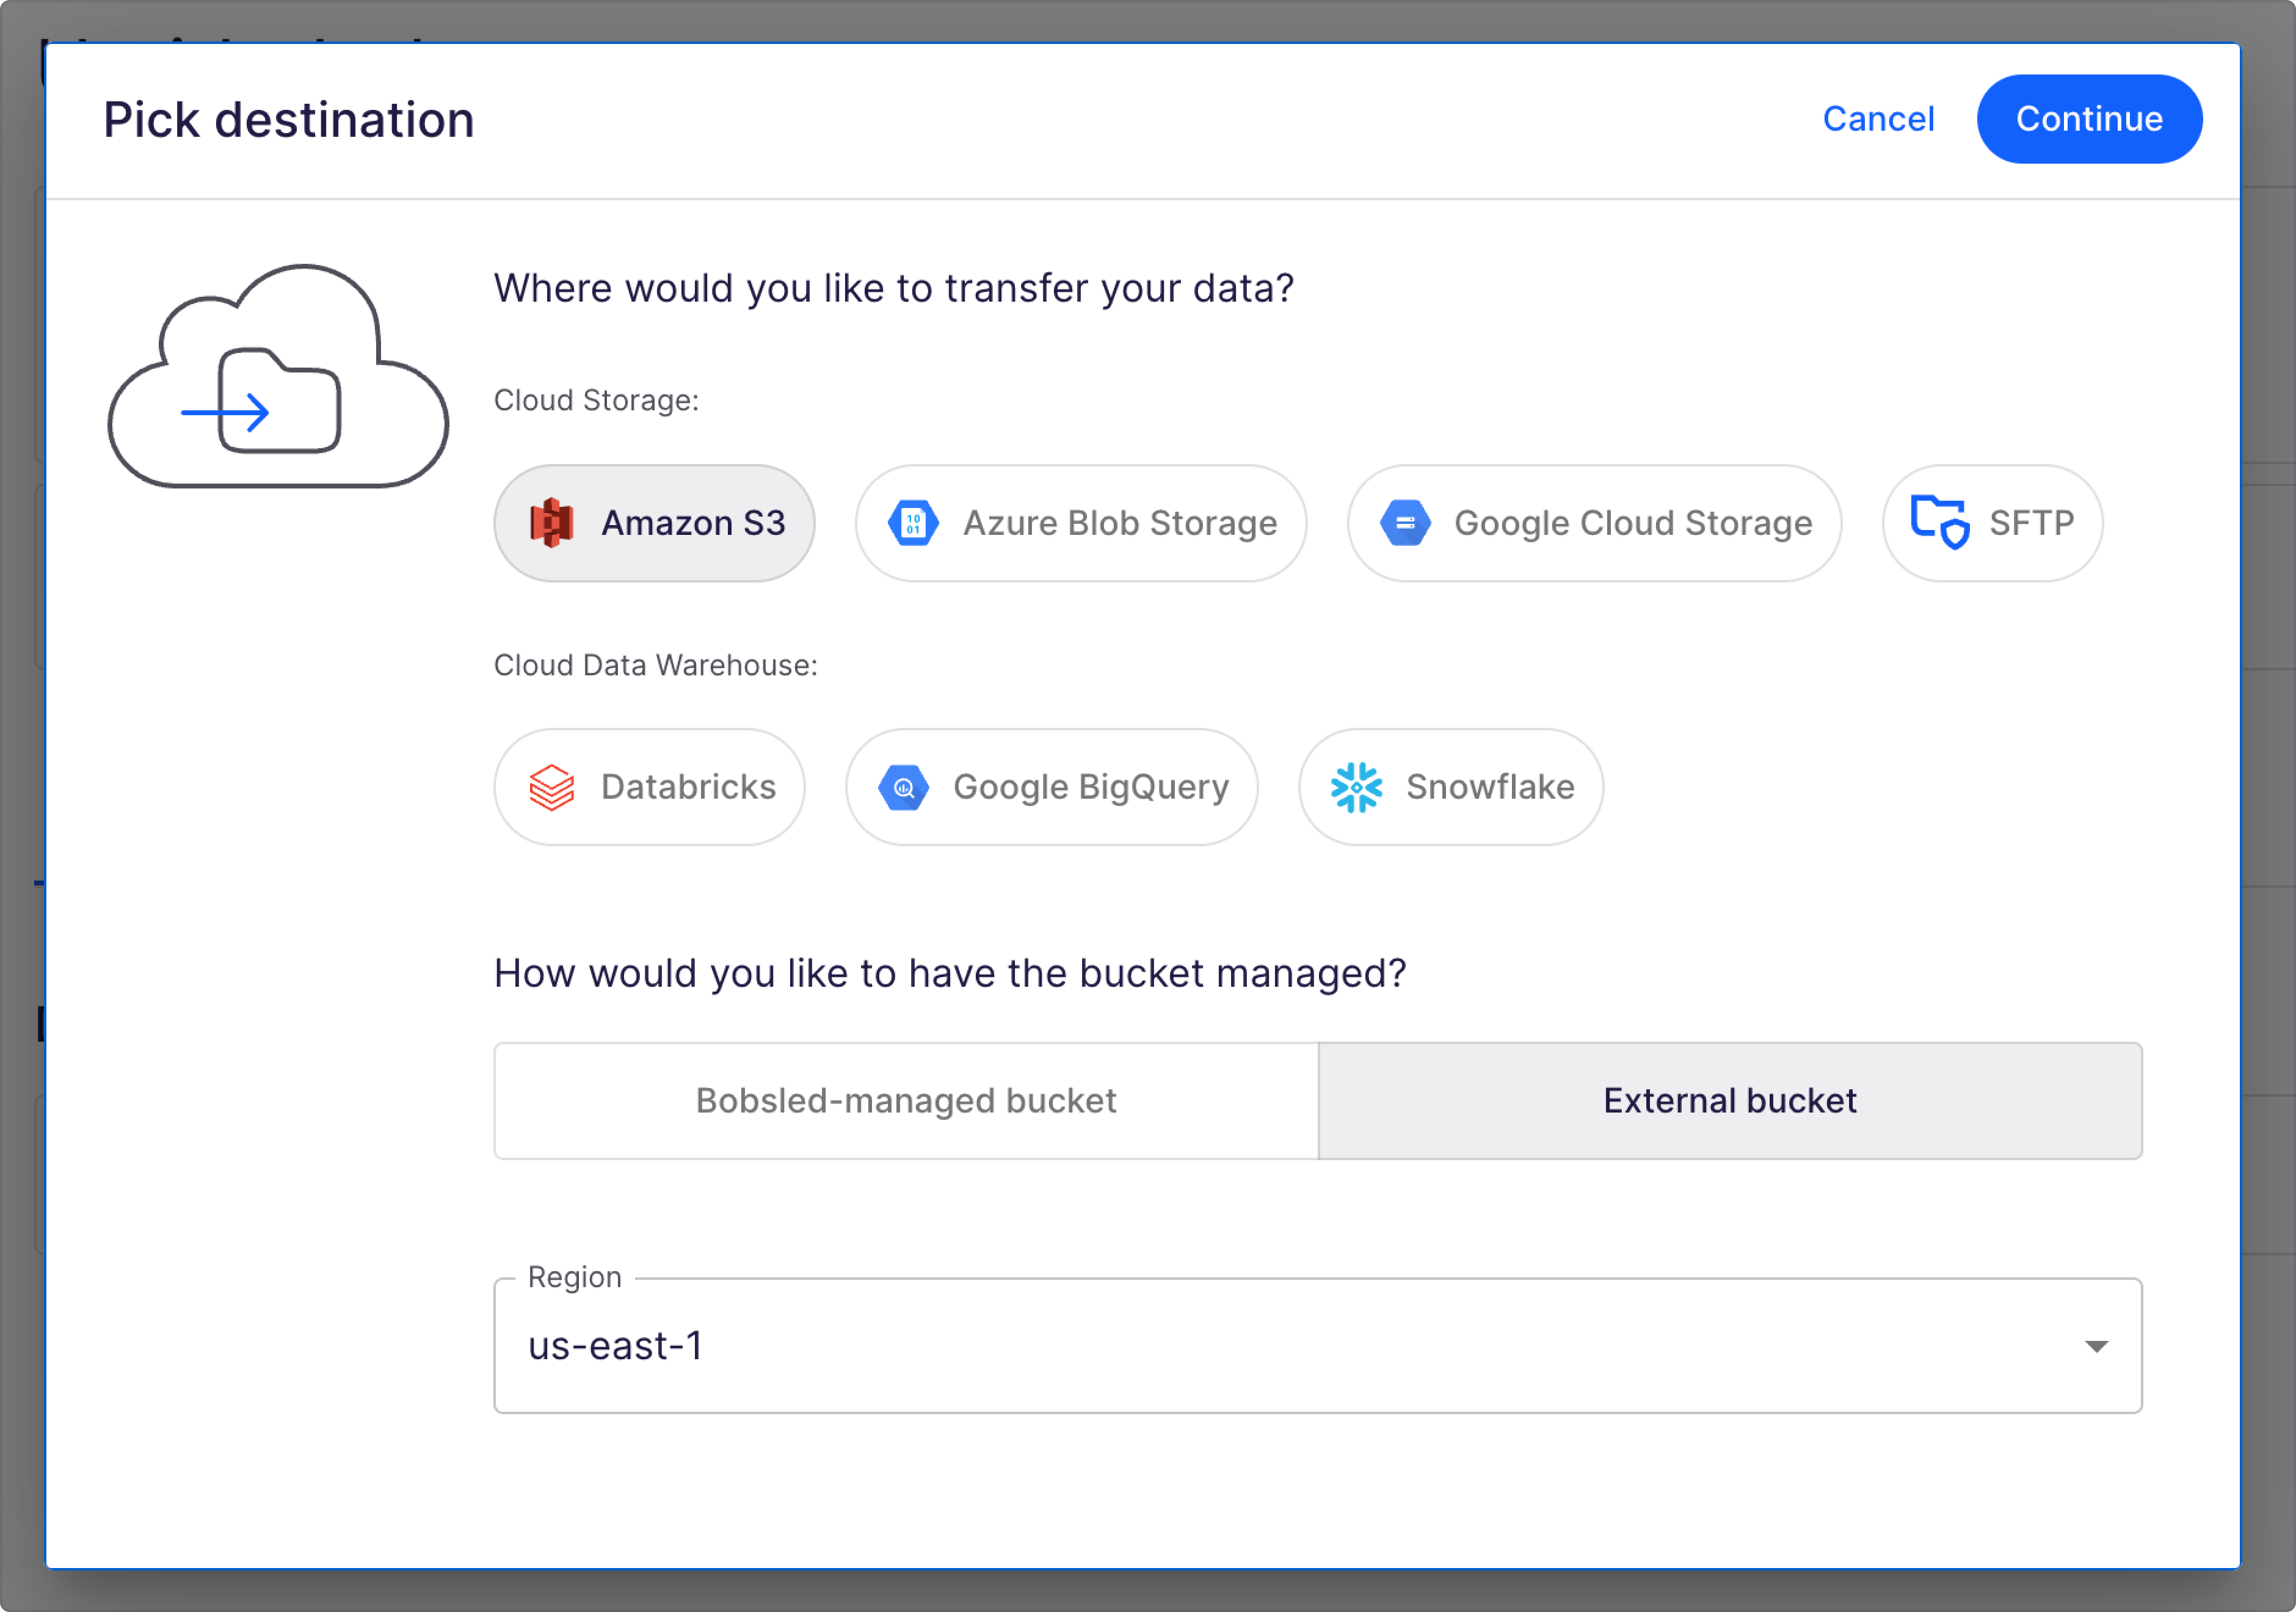
On the share page, click the box Pick Destination
Choose the cloud platform Amazon S3, and choose the region of the target bucket
Select "External bucket" and press continue

Step 2: Set up destination access
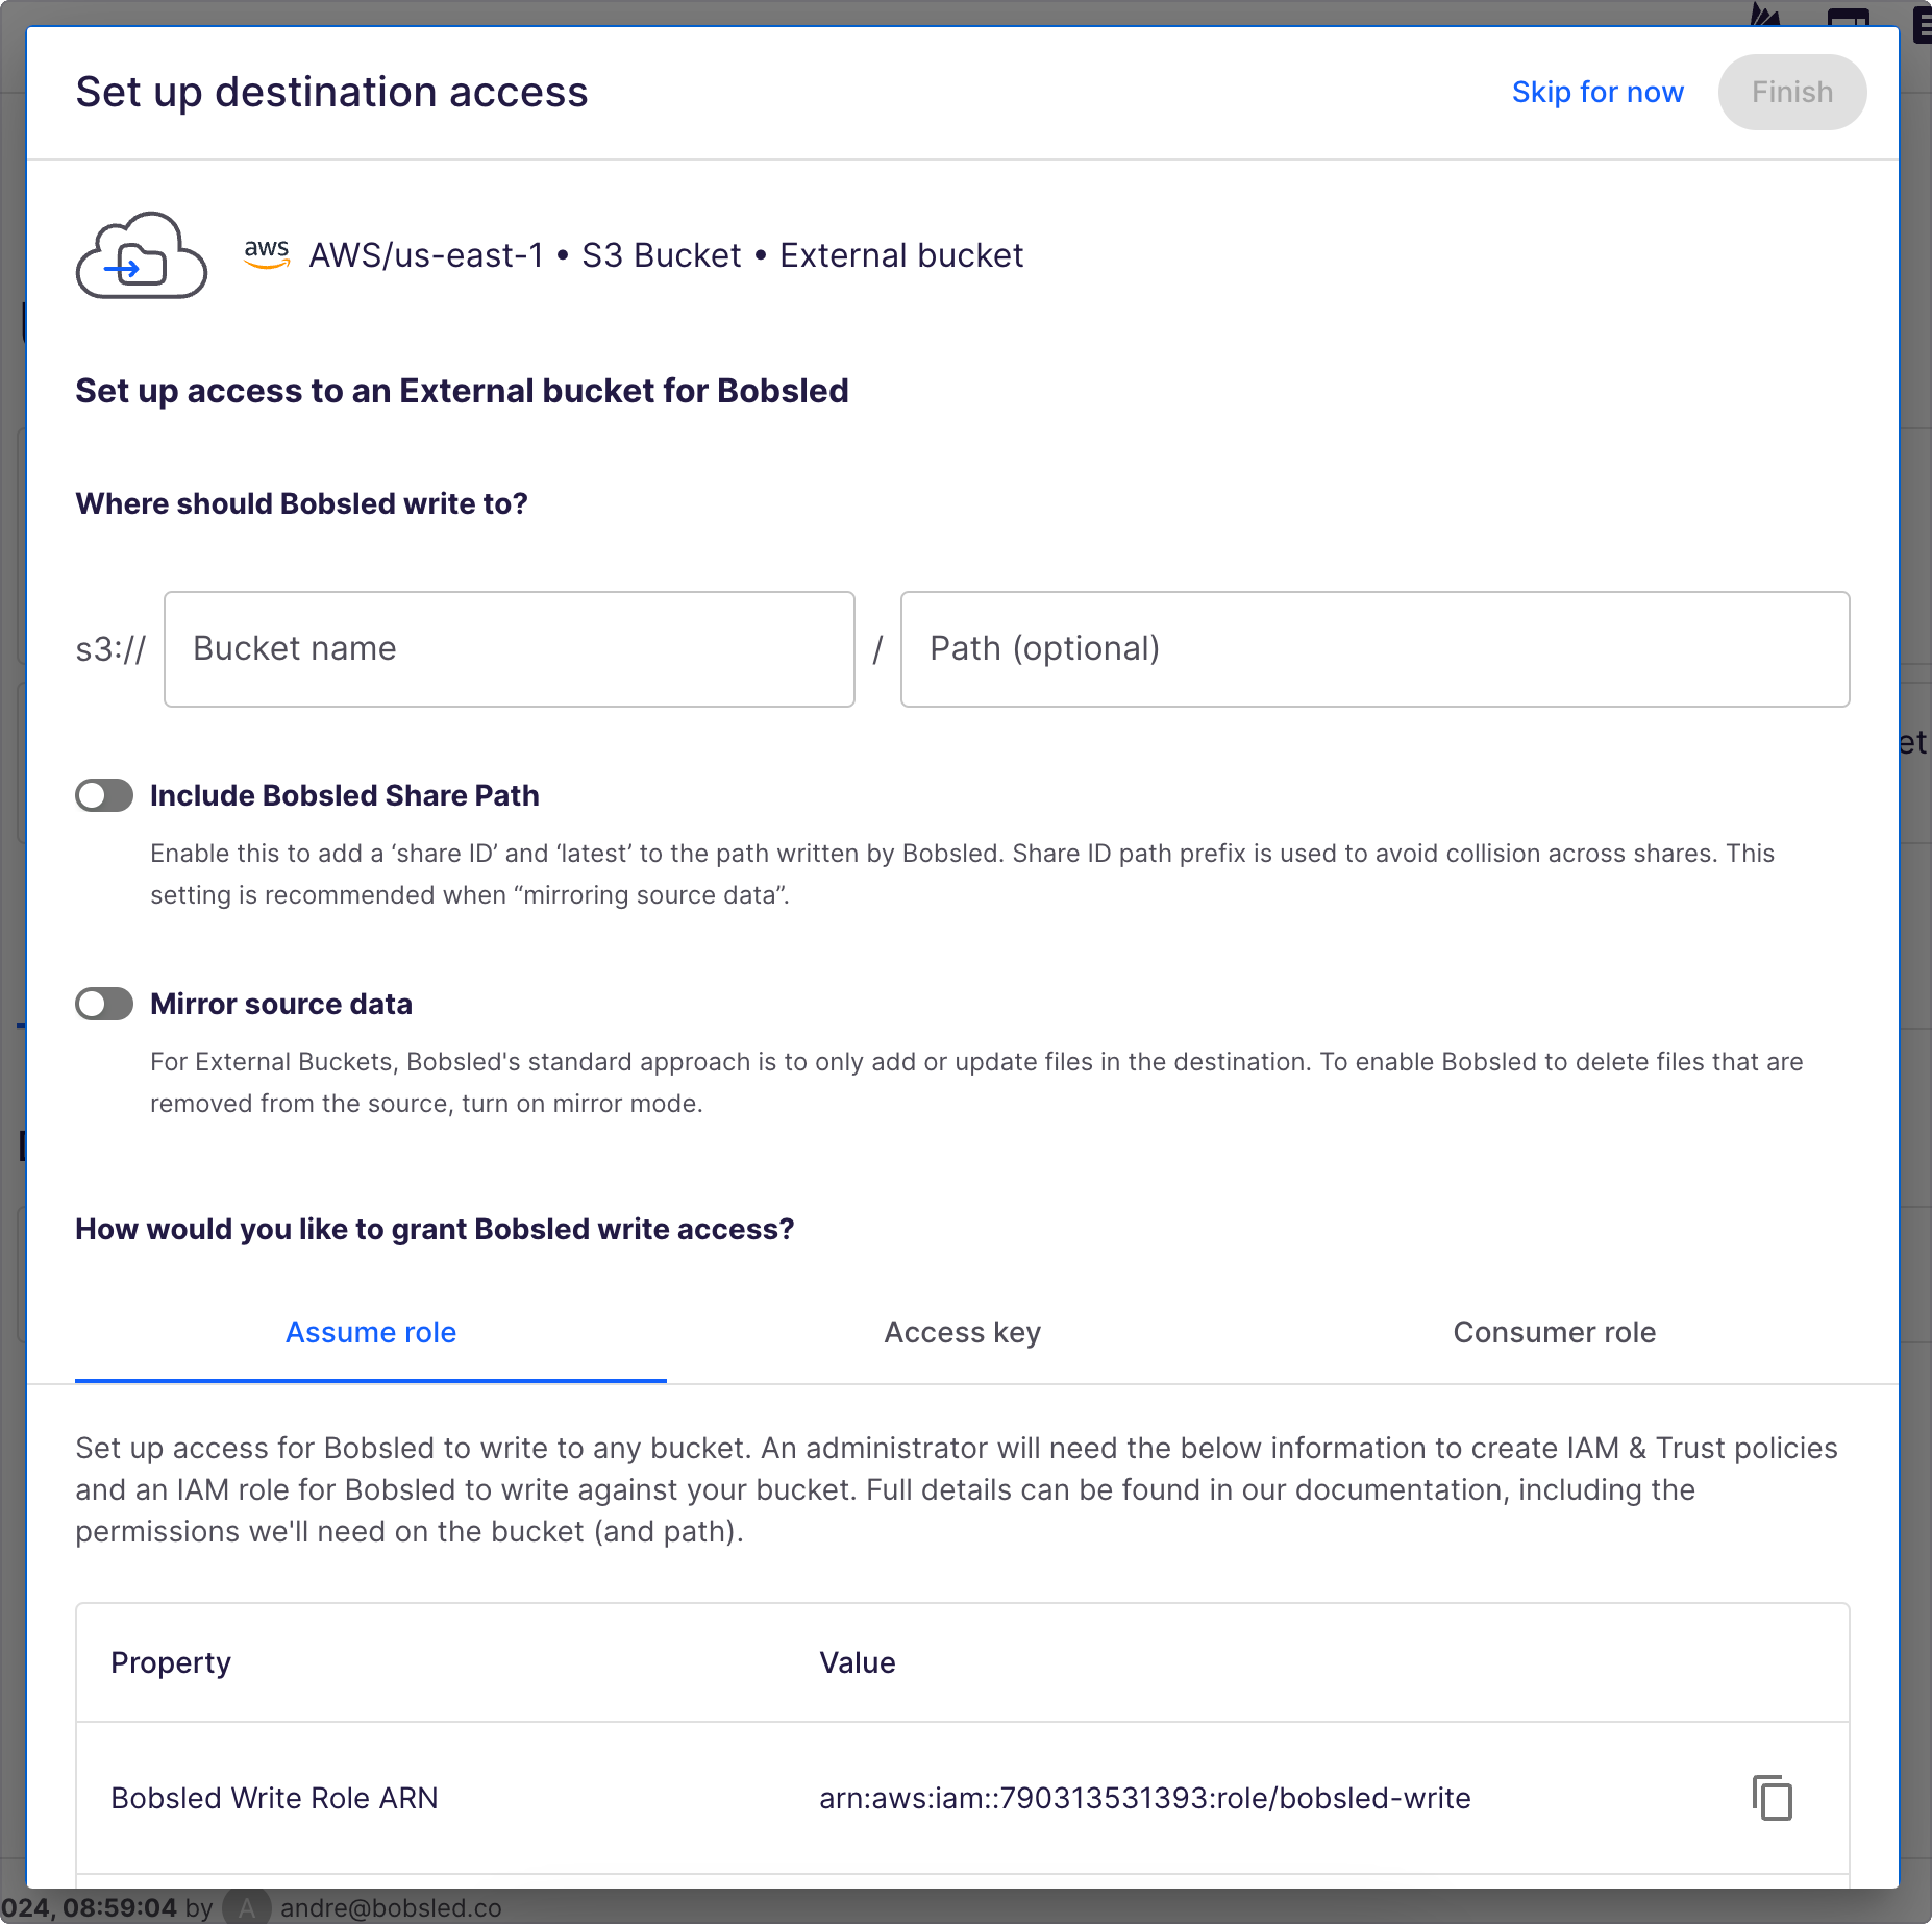
Bobsled has flexible options for how to write to an external bucket.
Provide the bucket name and optional path to write to:

If desired, you can enable:
Bobsled Share Path to add "share ID" and "latest" to the path written by Bobsled. This should be used when delivering via multiple shares to the same bucket to ensure they don’t overlap.
Mirror source data to allow Bobsled to delete files that are removed from the source. This mode tells Bobsled to match the contents of the source bucket to the destination.
TIP:
When using a Cloud Data Warehouse source or when removing files is not required, this setting is suggested to be off.
Finally, select how you'd like Bobsled to access the bucket:
Assume role: you give a
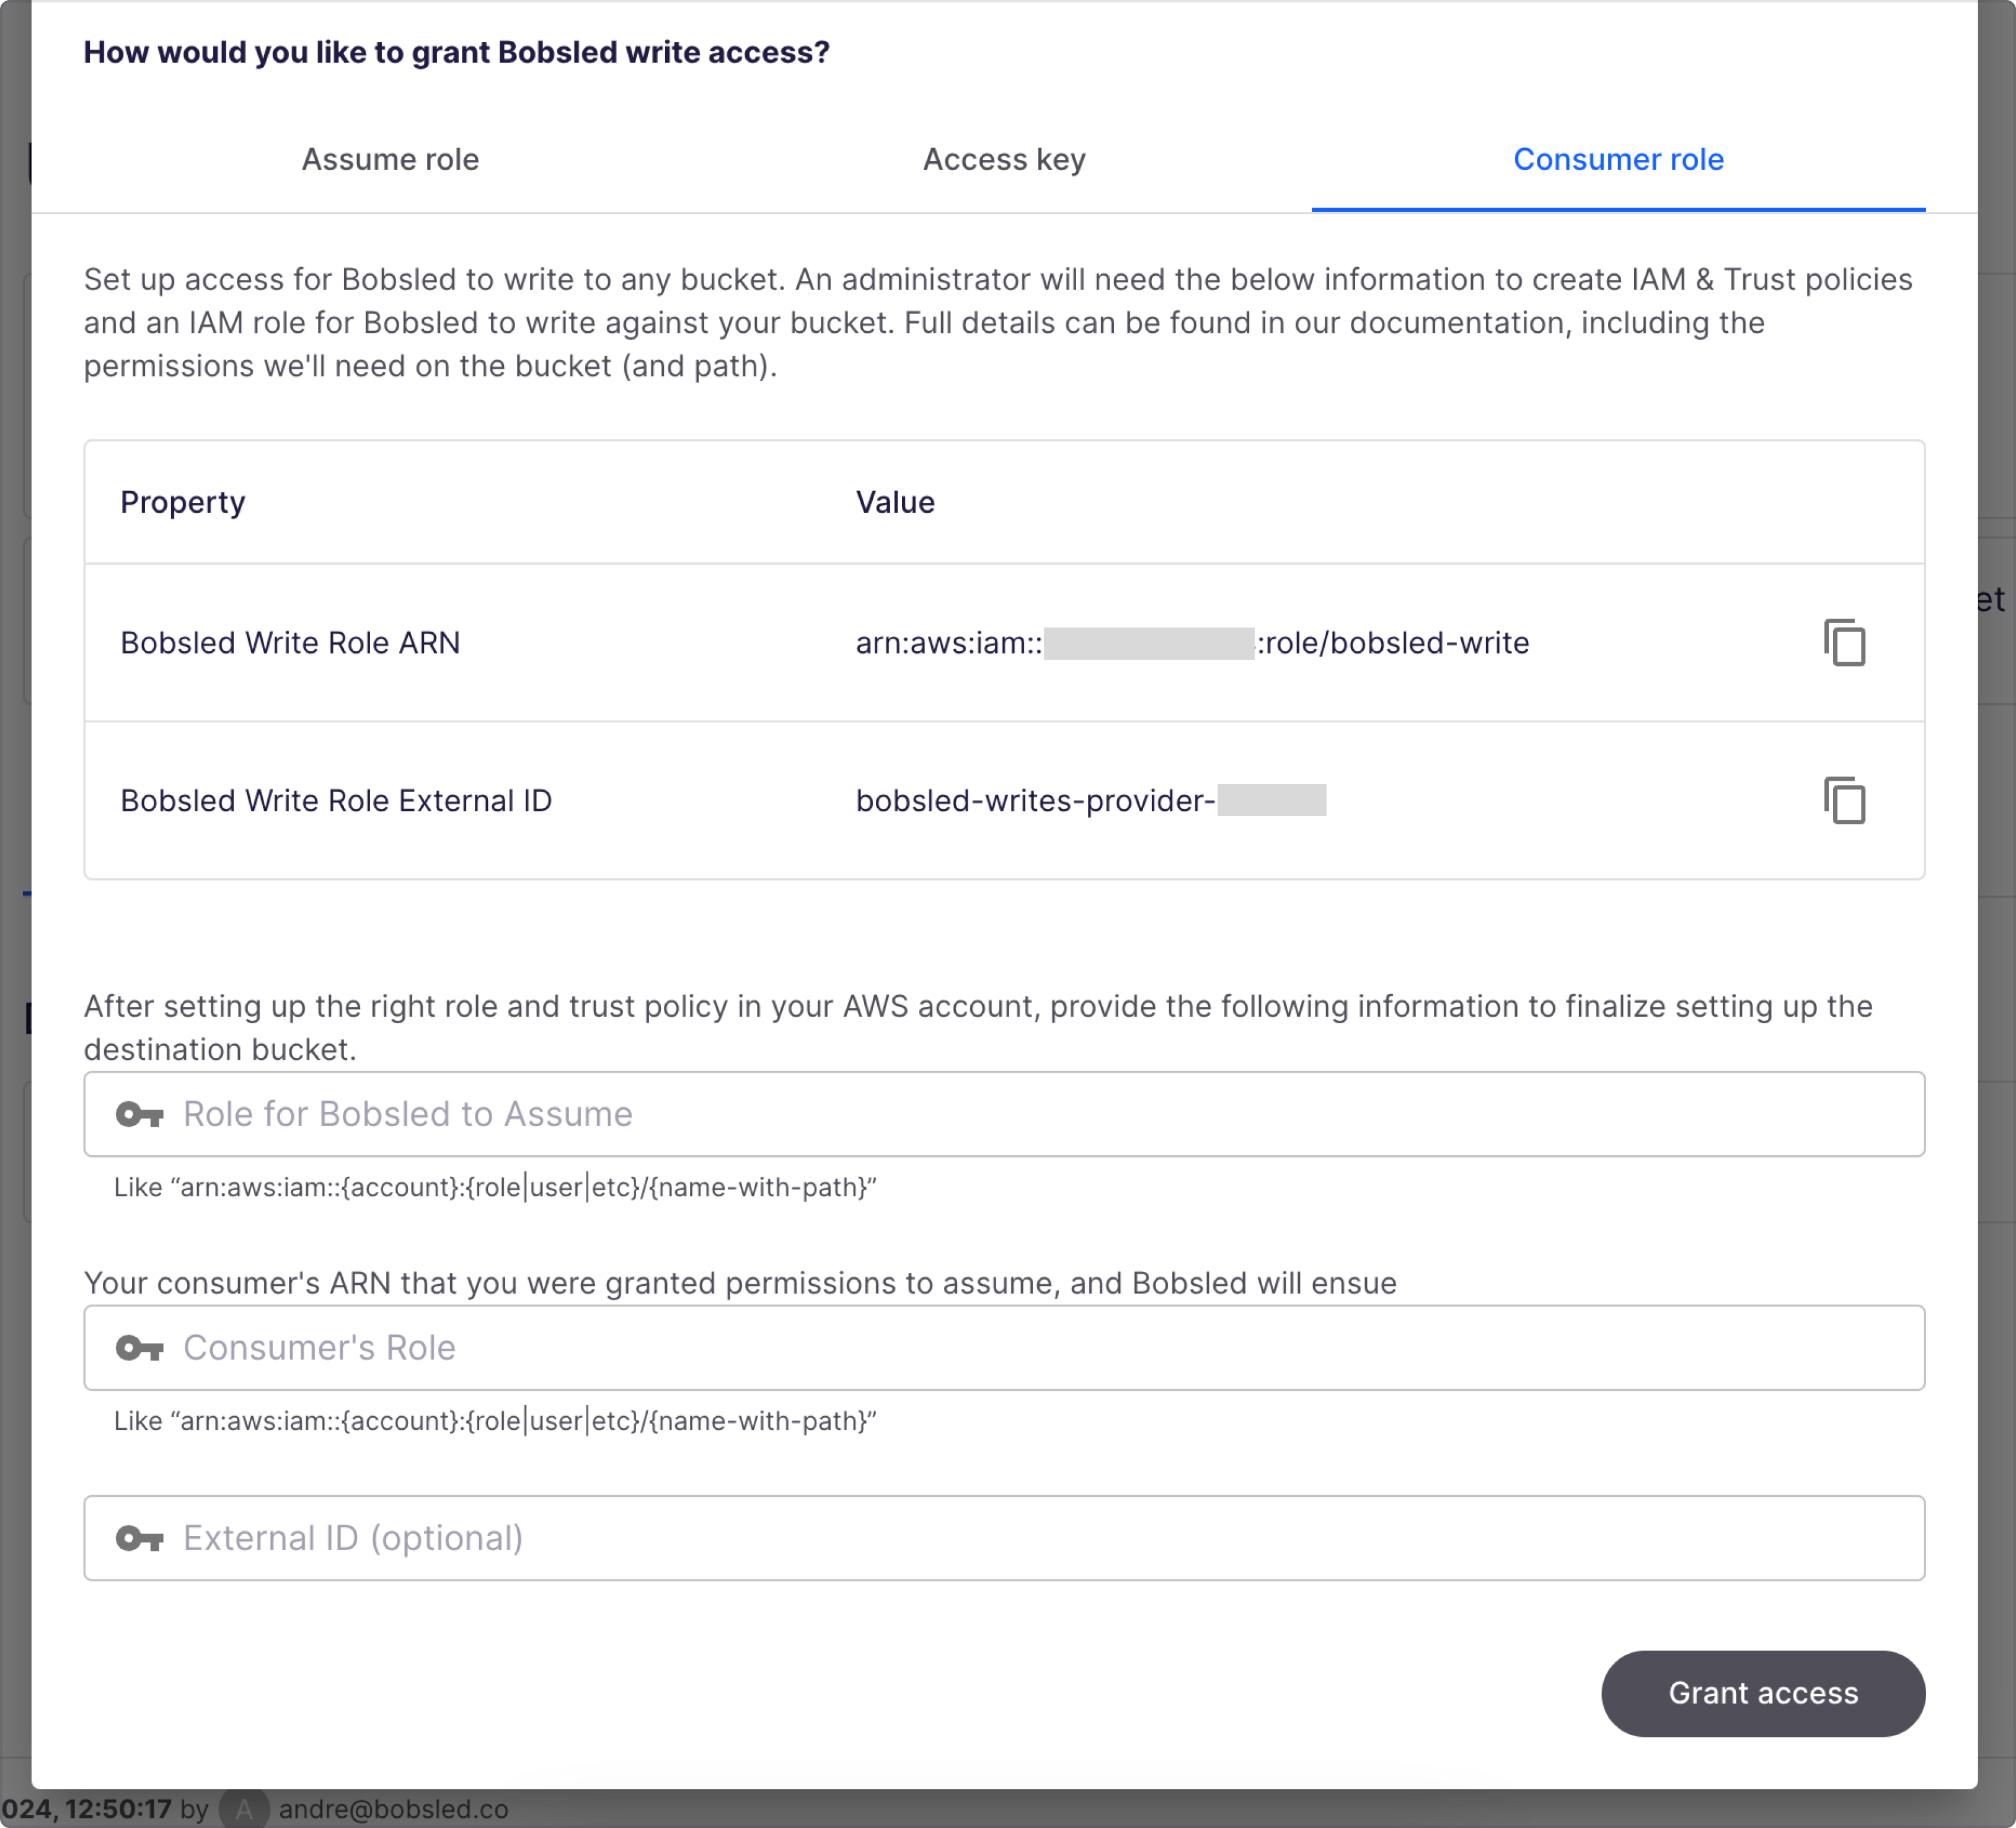
Bobsled ARNthe ability to assume a role within the external accountConsumer role: you give a Bobsled ARN the ability to assume a consumer role within the external account
Access key: you provide an AWS access key and secret
Option 1: “Assume role” setup
Prerequisites
To configure Bobsled access to the bucket, your user must have sufficient permissions to create policies and assign roles in Amazon Web Services (AWS).
Step 1: Create an IAM Policy
Log in to AWS Management Console;
From the ‘Services’ dropdown, select IAM under ‘Security, Identify & Compliance’ section;
Click Account Settings on the left-hand panel;
Expand the ‘Security Token Service (STS)’ list, find the AWS region corresponding to the region where your bucket is located, and choose ‘Activate’ if the status is ‘Inactive’;
Choose Policies ↗ from the left-hand navigation pane;
Click Create Policy;
Click the JSON tab;
Add JSON policy that allows Bobsled to write from the S3 bucket. The following policies provide Bobsled with the required permissions to read data from a specified list of entire buckets or subfolders. Please replace
placeholderswith your bucket name(s), and pay special attention to the trailing/*. It should be present on the first statement, but not on the second one:
NOTE:
When testing connection to the S3 destination, Bobsled writes a temporary file called
_CONNECTION_TEST, then immediately deletes it. If you choose not to gives3:DeleteObjectpermissions, you will need to manually delete the temporary file from your bucket or subfolder.
Allow Bobsled to write to an entire bucket.
{
  "Version": "2012-10-17",
  "Statement": [
    {
      "Effect": "Allow",
      "Action": [
        "s3:GetObject",
        "s3:GetObjectVersion",
        "s3:GetObjectAttributes",
        "s3:PutObject",
        "s3:DeleteObject"
      ],
      "Resource": [
        "arn:aws:s3:::<bucket-name>/*"
      ]
    },
    {
      "Effect": "Allow",
      "Action": [
        "s3:ListBucket",
        "s3:GetBucketLocation"
      ],
      "Resource": [
        "arn:aws:s3:::<bucket-name>"
      ]
    }
  ]
}
Allow Bobsled to write to subfolders within a bucket.
{
  "Version": "2012-10-17",
  "Statement": [
    {
      "Effect": "Allow",
      "Action": [
        "s3:GetObject",
        "s3:GetObjectVersion",
        "s3:GetObjectAttributes",
        "s3:PutObject",
        "s3:DeleteObject"
      ],
      "Resource": [
        "arn:aws:s3:::<bucket-name>/subfolder/*"
      ]
    },
    {
      "Sid": "AllowListingOfSubFolder",
      "Action": [
        "s3:ListBucket",
        "s3:GetBucketLocation"
      ],
      "Effect": "Allow",
      "Resource": [
        "arn:aws:s3:::<bucket-name>"
      ],
      "Condition": {
        "StringLike": {
          "s3:prefix": [
            "subfolder/*"
          ]
        }
      }
    }
  ]
}
Click Next: Tags;
Optionally add tags to the policy to help identify, organize, or search for AWS resources;
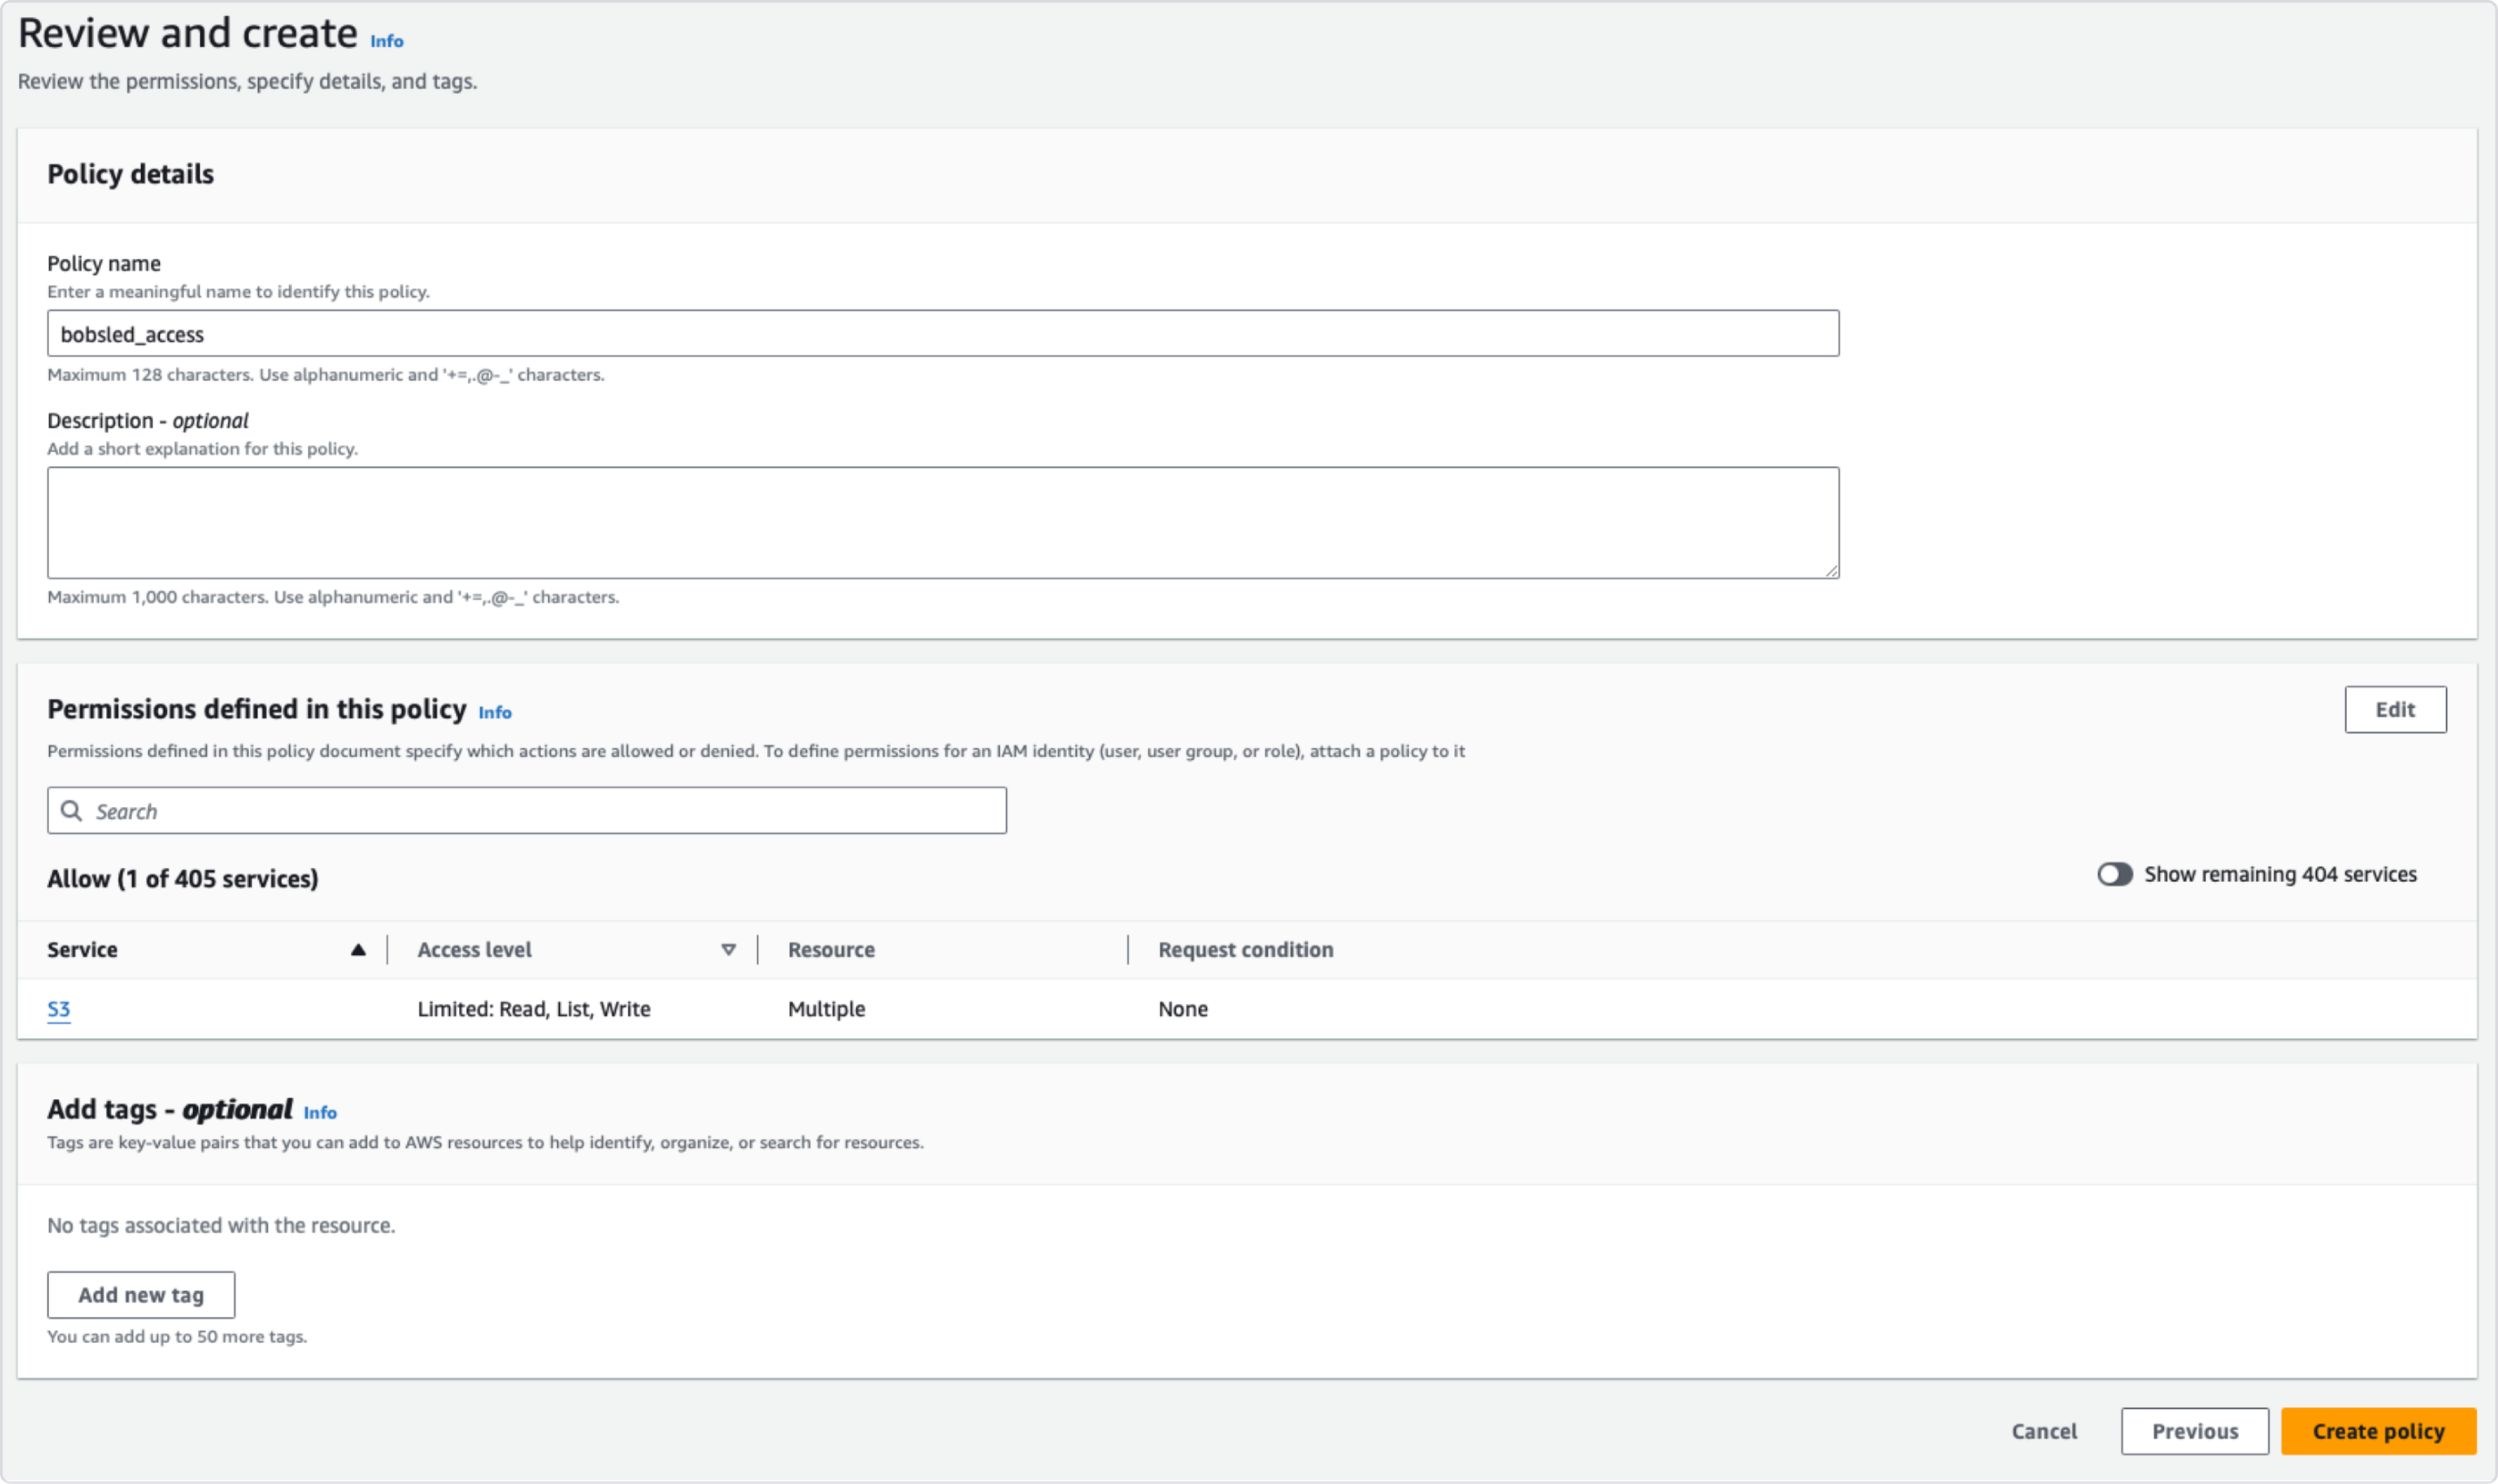
Create a policy name (e.g. bobsled_access), and optionally add a description;
Click create policy.

Step 2: Create an IAM Role
Log in to AWS Management Console;
From the ‘Services’ dropdown, select IAM under the ‘Security, Identity & Compliance’ header';
Click Roles on the left-hand panel;
Click the Create role button;
Under ‘Trusted entity type, select Custom trust policy
Set the trust policy using the following JSON:
Replace the
<awsBobsledWriteArn>and<awsBobsledWriteExternalId>in the JSON below with the values found in the Bobsled application. These values can be found by visiting Data Sources > Add Source > select Amazon S3.
.png)
{
  "Version": "2012-10-17",
  "Statement": [
    {
      "Effect": "Allow",
      "Principal": {
        "AWS": "<awsBobsledWriteArn>"
      },
      "Action": "sts:AssumeRole",
      "Condition": {
        "StringEquals": {
          "sts:ExternalId": "<awsBobsledWriteExternalId>"
        }
      }
    }
  ]
}
Click the Next button;
Find the policy you created in the previous section, and select this policy;
Click the Next button;
Enter a name and description for the role, and click the Create role button;
Record the Role ARN value located on the role summary page. You will use the Role ARN to configure your source in Bobsled.
Step 3: For KMS Encrypted Buckets Only
Grant Bobsled Role Access to Encryption Keys:
Navigate to the S3 bucket, click on Properties > Default encryption section.

Click the link for the Encryption key ARN
Scroll down to the Key users section. Click Add.

Search for the role created for Bobsled in the previous section. Select the checkbox to the left of the role. Click Add.
.png)
Option 2: “Consumer role” setup
Prerequisites
To configure Bobsled access to the bucket, your user must have sufficient permissions to create policies and assign roles in Amazon Web Services (AWS).
Step 1: Create an IAM Policy (Provider)
Log in to AWS Management Console
From the Services dropdown, select IAM under Security, Identify & Compliance section
Click Account Settings on the left-hand panel
Expand the Security Token Service (STS) list, find the AWS region corresponding to the region where your bucket is located, and choose Activate if the status is Inactive.
Choose Policies ↗ from the left-hand navigation pane
Click Create Policy
Click the JSON tab
Add JSON policy that allows Bobsled to assume the role. The following policies provide Bobsled with the required permissions to assume a role that will be used to assume a Consumer role.
{
	"Version": "2012-10-17",
	"Statement": [
		{
			"Sid": "AllowAssumingRoleInConsumerAWS",
			"Effect": "Allow",
			"Action": [
				"sts:GetSessionToken",
				"sts:AssumeRole",
				"sts:GetCallerIdentity"
			],
			"Resource": "*"
		}
	]
}
Create a policy name (e.g. bobsled_access) and an optional description. Click Create policy.
.png)
Step 2: Create an IAM Role (Provider)
Log in to AWS Management Console;
From the ‘Services’ dropdown, select IAM under the ‘Security, Identity & Compliance’ header';
Click Roles on the left-hand panel;
Click the Create role button;
Under ‘Trusted entity type, select Custom trust policy
Set the trust policy using the following JSON:
Replace the
<awsBobsledWriteArn>and<awsBobsledWriteExternalId>in the JSON below with the values found in the Bobsled application. These values can be found by visiting Data Sources > Add Source > select Amazon S3.
{
  "Version": "2012-10-17",
  "Statement": [
    {
      "Effect": "Allow",
      "Principal": {
        "AWS": "<awsBobsledWriteArn>"
      },
      "Action": "sts:AssumeRole",
      "Condition": {
        "StringEquals": {
          "sts:ExternalId": "<awsBobsledWriteExternalId>"
        }
      }
    }
  ]
}
Click the Next button
Find the policy you created in the previous section, and select this policy
Click the Next button
Enter a name and description for the role, and click the Create role button
Record the Role ARN value located on the role summary page. You will use the Role ARN to configure your destination bucket in Bobsled.
Step 3: Create an IAM Policy (Consumer)
Log in to AWS Management Console
From the Services dropdown, select IAM under Security, Identify & Compliance section
Click Account Settings on the left-hand panel
Expand the Security Token Service (STS) list, find the AWS region corresponding to the region where your bucket is located, and choose Activate if the status is Inactive.
Choose Policies ↗ from the left-hand navigation pane
Click Create Policy
Click the JSON tab
Add JSON policy that allows Bobsled to write to the S3 bucket. The following policies provide Bobsled with required permissions to write data to the bucket or a specific path. Please replace placeholders with your bucket name(s), and pay special attention to the trailing
/*. It should be present on the first statement, but not on the second one.Allow Bobsled to write to an entire bucket.
{
  "Version": "2012-10-17",
  "Statement": [
    {
      "Effect": "Allow",
      "Action": [
        "s3:GetObject",
        "s3:GetObjectVersion",
        "s3:GetObjectAttributes",
        "s3:PutObject",
        "s3:DeleteObject"
      ],
      "Resource": [
        "arn:aws:s3:::<bucket-name>/*"
      ]
    },
    {
      "Effect": "Allow",
      "Action": [
        "s3:ListBucket",
        "s3:GetBucketLocation"
      ],
      "Resource": [
        "arn:aws:s3:::<bucket-name>"
      ]
    }
  ]
}
Allow Bobsled to write to subfolders within a bucket.
{
  "Version": "2012-10-17",
  "Statement": [
    {
      "Effect": "Allow",
      "Action": [
        "s3:GetObject",
        "s3:GetObjectVersion",
        "s3:GetObjectAttributes",
        "s3:PutObject",
        "s3:DeleteObject"
      ],
      "Resource": [
        "arn:aws:s3:::<bucket-name>/subfolder/*"
      ]
    },
    {
      "Sid": "AllowListingOfSubFolder",
      "Action": [
        "s3:ListBucket",
        "s3:GetBucketLocation"
      ],
      "Effect": "Allow",
      "Resource": [
        "arn:aws:s3:::<bucket-name>"
      ],
      "Condition": {
        "StringLike": {
          "s3:prefix": [
            "subfolder/*"
          ]
        }
      }
    }
  ]
}
Create a policy name (e.g., bobsled_access) and an optional description. Click Create policy.
.png)
Step 4: Create an IAM Role (Consumer)
Log in to AWS Management Console
From the Services dropdown, select IAM under the Security, Identity & Compliance header
Click Roles on the left-hand panel
Click the Create role button.
Under Trusted entity type, select Custom trust policy
Set the trust policy using the following JSON:
Replace the
<awsProviderWriteArn>in the JSON below with the value provided by the provider. You can skip "Condition" part of the policy, but if you choose to set it, let the provider know.{ "Version": "2012-10-17", "Statement": [ { "Effect": "Allow", "Principal": { "AWS": "<awsProviderdWriteArn>" }, "Action": "sts:AssumeRole", "Condition": { "StringEquals": { "sts:ExternalId": "<awsProviderWriteExternalId>" } } } ] }
Click the Next button
Find the policy you created in the previous section, and select this policy
Click the Next button
Enter a name and description for the role, and click the Create role button
Record the Role ARN value located on the role summary page. You will use the Role ARN to configure your destination bucket in Bobsled.
After setting up the destination in a Share, and picking a source, you can get started and create a data transfer to share data with your consumers.
Option 3: Access Key
Prerequisites
To configure Bobsled access to the bucket, your data consumer must have sufficient permissions to create an Access key for user(s) in IAM in the AWS account where the external bucket lives. This user will need to have an attached IAM policy that includes at minimum all of the permissions in the sample policy below, where arn:aws:s3:::<bucket-name>/* is the path of the external bucket to which Bobsled will write data:
{
  "Version": "2012-10-17",
  "Statement": [
    {
      "Effect": "Allow",
      "Action": [
        "s3:GetObject",
        "s3:GetObjectVersion",
        "s3:GetObjectAttributes",
        "s3:PutObject",
        "s3:DeleteObject"
      ],
      "Resource": [
        "arn:aws:s3:::<bucket-name>/*"
      ]
    },
    {
      "Effect": "Allow",
      "Action": [
        "s3:ListBucket",
        "s3:GetBucketLocation"
      ],
      "Resource": [
        "arn:aws:s3:::<bucket-name>"
      ]
    }
  ]
}
Step 1 (AWS): Generate an Access Key on the relevant AWS IAM users
Log in to AWS Management Console and navigate to the Users section of IAM
Select the User you would like to use to grant Bobsled access to the external bucket
Select the Security credentials tab on the Users IAM page and scroll down to the Access keys section
Use the Create access key button to generate the needed credential. Be sure to securely store the secret access key for your records.
Copy both the Access Key and Secret Access Key and send to your Data Provider for use in Delivering the data.
Step 2 (Bobsled): Enter the Access Key & Secret Access Key in Bobsled
Enter the Access Key and Secret Access Key in the relevant text boxes under Access key in the How would you like to grant Bobsled write access? section of the Set up destination access page.